Seolleongtang Ox Bone Soup Recipe – Milky, Comforting Korean Broth
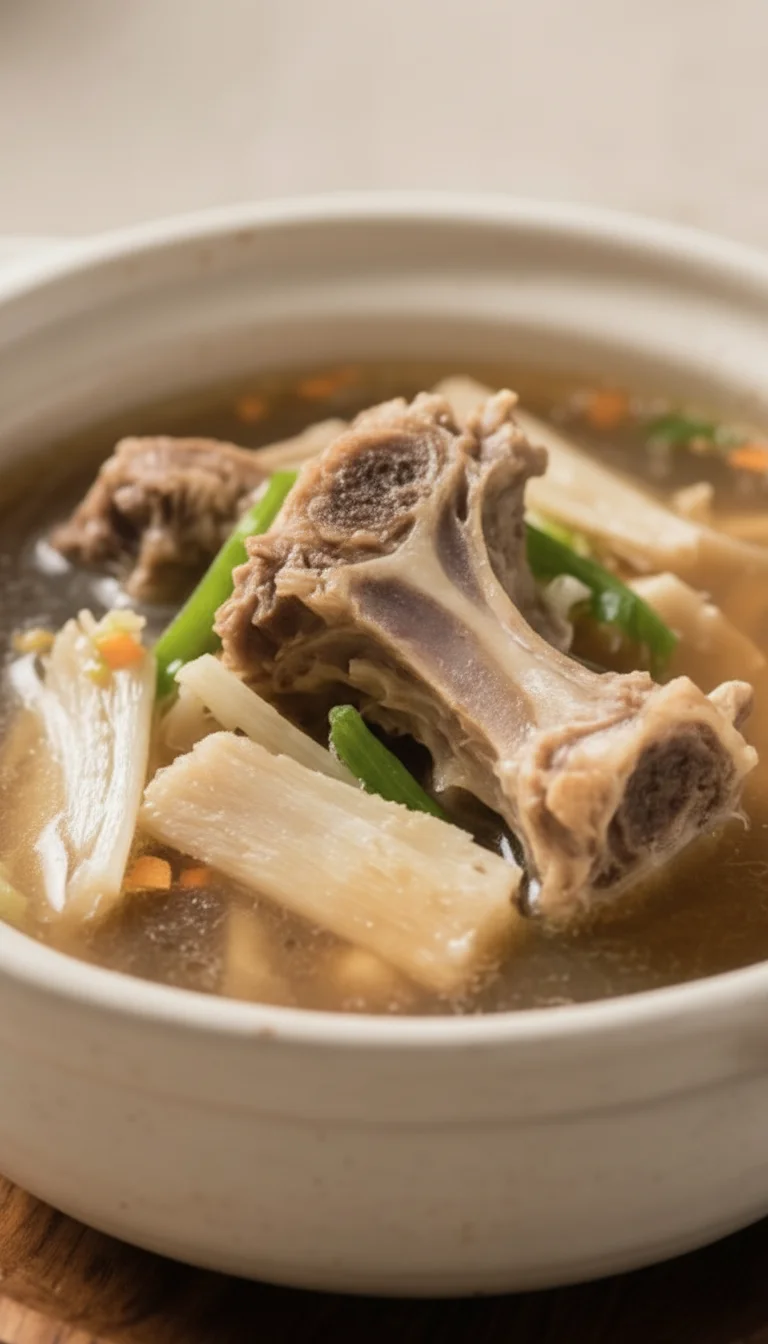
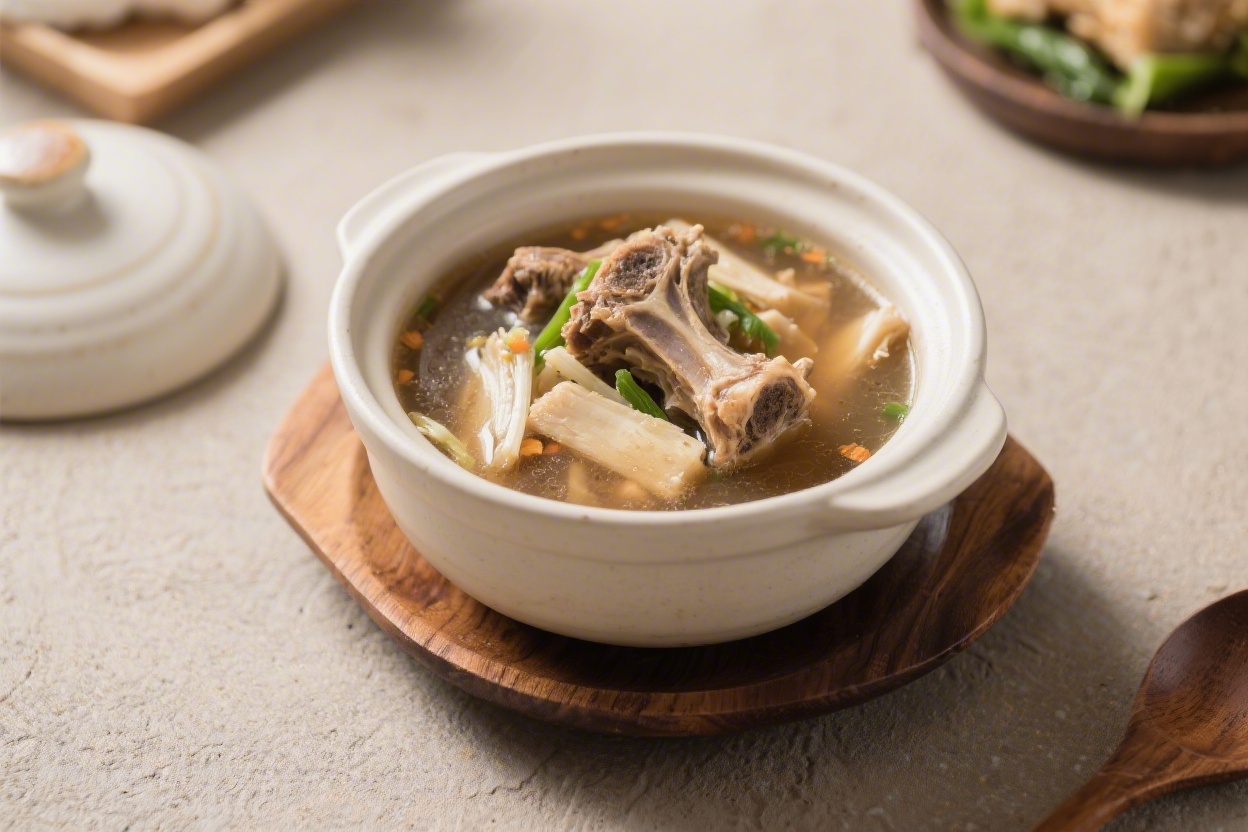
Seolleongtang is the kind of soup that warms you from the inside out. It’s simple at heart just beef bones, time, and patience yet the result is rich, silky, and deeply comforting. If you’ve had it at a Korean restaurant, you know that signature milky-white broth and the gentle beef flavor.
The good news is you can make it at home with a few basics and a long simmer. This version is straightforward, reliable, and easy to customize at the table.
Why This Recipe Works
This broth turns milky because the bones are simmered long and low, letting collagen and marrow emulsify into the water. Pre-soaking and blanching the bones remove excess blood and impurities, which keeps the flavor clean. Using a mix of leg and knuckle bones gives the best balance of body and clarity. Finishing with sliced brisket and simple toppings keeps the focus on the broth, where it belongs.
What You’ll Need
- Beef leg bones and knuckle bones (about 4–5 pounds total)
- Beef brisket or shank (1–1.5 pounds), for sliced meat
- Water (plenty—enough to cover bones by several inches; you’ll refill during cooking)
- Scallions, thinly sliced (for topping)
- Garlic (4–6 cloves), lightly crushed (optional for fragrance)
- Salt and black pepper, to taste (season at the table)
- Cooked white rice or somyeon (thin wheat noodles), for serving
- Kkakdugi (radish kimchi) or baechu kimchi, for the classic side
How to Make It
- Soak the bones: Rinse bones under cold water, then soak in a large pot of cold water for 1–2 hours.Change the water once or twice until it runs mostly clear.
- Blanch to remove impurities: Place bones in a large pot, cover with fresh water, and bring to a rolling boil for 10 minutes. Drain, rinse the bones, and scrub any scum. Rinse the pot well.
- Start the first simmer: Return cleaned bones to the pot.Add enough fresh water to cover by 2–3 inches. Bring to a boil, then reduce to a gentle simmer. Skim foam for the first 20 minutes.
- Add the brisket: After 45–60 minutes, nestle the brisket or shank into the pot.Simmer gently for 1.5–2 hours more, until the meat is tender. Remove the meat, cool, and slice thinly. Refrigerate it until serving.
- Keep simmering the bones: Continue simmering the bones for 6–10 hours total. Low and steady is key.Add hot water as needed to keep bones submerged. The broth should gradually turn cloudy and ivory.
- Optional second extraction: For extra richness, strain the first broth, set aside, and cover bones with fresh water. Simmer another 4–6 hours.Combine broths to taste for body and flavor.
- Season at the table: Seolleongtang is traditionally served unseasoned. Ladle hot broth into bowls, add sliced brisket and scallions, and let each person add salt and pepper to their liking.
- Serve: Add rice or noodles directly to the bowl. Enjoy with kimchi for brightness and crunch.
Keeping It Fresh
Cool the broth quickly by dividing it into smaller containers. Refrigerate up to 4 days, or freeze up to 3 months.
The broth may gel in the fridge—this is good and means you extracted lots of collagen. Reheat gently and whisk to restore its silky body. Store sliced meat separately so it doesn’t overcook when reheating.
Benefits of This Recipe
- Nutrient-rich broth: Long-simmered bones release collagen, gelatin, and minerals for a satisfying, soothing soup.
- Budget-friendly: Bones are inexpensive, and the yield is generous.
- Make-ahead friendly: Big batches freeze beautifully for quick future meals.
- Customizable: Each bowl can be seasoned and topped exactly how you like.
What Not to Do
- Don’t skip soaking and blanching: Otherwise, you’ll have a murky, overly beefy broth with off-flavors.
- Don’t boil aggressively the whole time: A raging boil can emulsify fat unevenly and make the broth taste harsh.Keep it at a steady simmer.
- Don’t season the whole pot early: Salt can tighten proteins and affect extraction. Season in the bowl instead.
- Don’t use only marrow bones: You need knuckles and joints for gelatin and body.
Variations You Can Try
- Garlic-forward: Add a few more cloves during the last hour for a gentle garlicky note.
- Mixed cuts: Use oxtail with knuckles for extra richness and tender meat pieces.
- Light and clear: Blend more first extraction with a bit of second extraction to adjust body and color.
- Herb twist (non-traditional): Add a knob of ginger and a few white peppercorns for a subtle warmth.
- Noodle shop style: Serve with thin wheat noodles, a drizzle of sesame oil, and extra scallions.
FAQ
Why isn’t my broth turning milky?
You may be simmering too gently or not long enough, or using bones with too little collagen. Include knuckles and joints, keep a steady simmer for hours, and don’t be afraid to do a second extraction and combine.
Can I use a pressure cooker?
Yes. Cook cleaned bones with water on high pressure for 1.5–2 hours, do a natural release, and check the color. You may still want to simmer uncovered afterward to develop the right body and taste.
How should I season it?
Traditionally, each person seasons their bowl with salt, black pepper, and sliced scallions. Some also add a spoon of the kimchi brine for a tangy kick.
Can I reuse the bones?
Absolutely. After the first broth, cover bones with fresh water and simmer again for a lighter second broth. Combine to your preferred richness.
What’s the best side dish?
Kkakdugi (radish kimchi) is classic with seolleongtang. Its crunch and acidity balance the rich, mild broth beautifully.
In Conclusion
Seolleongtang rewards time and care with a clean, milky broth that feels like pure comfort. With a few key steps soak, blanch, slow simmer you’ll get restaurant-quality results at home. Keep it simple, season in the bowl, and serve with rice, noodles, and kimchi. It’s a humble, heartwarming soup you’ll come back to again and again.
Ingredients
Method
- Soak the bones: Rinse bones under cold water, then soak in a large pot of cold water for 1–2 hours. Change the water once or twice until it runs mostly clear.
- Blanch to remove impurities: Place bones in a large pot, cover with fresh water, and bring to a rolling boil for 10 minutes. Drain, rinse the bones, and scrub any scum. Rinse the pot well.
- Start the first simmer: Return cleaned bones to the pot. Add enough fresh water to cover by 2–3 inches. Bring to a boil, then reduce to a gentle simmer. Skim foam for the first 20 minutes.
- Add the brisket: After 45–60 minutes, nestle the brisket or shank into the pot. Simmer gently for 1.5–2 hours more, until the meat is tender. Remove the meat, cool, and slice thinly. Refrigerate it until serving.
- Keep simmering the bones: Continue simmering the bones for 6–10 hours total. Low and steady is key. Add hot water as needed to keep bones submerged. The broth should gradually turn cloudy and ivory.
- Optional second extraction: For extra richness, strain the first broth, set aside, and cover bones with fresh water. Simmer another 4–6 hours. Combine broths to taste for body and flavor.
- Season at the table: Seolleongtang is traditionally served unseasoned. Ladle hot broth into bowls, add sliced brisket and scallions, and let each person add salt and pepper to their liking.
- Serve: Add rice or noodles directly to the bowl. Enjoy with kimchi for brightness and crunch.
Printable Recipe Card
Want just the essential recipe details without scrolling through the article? Get our printable recipe card with just the ingredients and instructions.