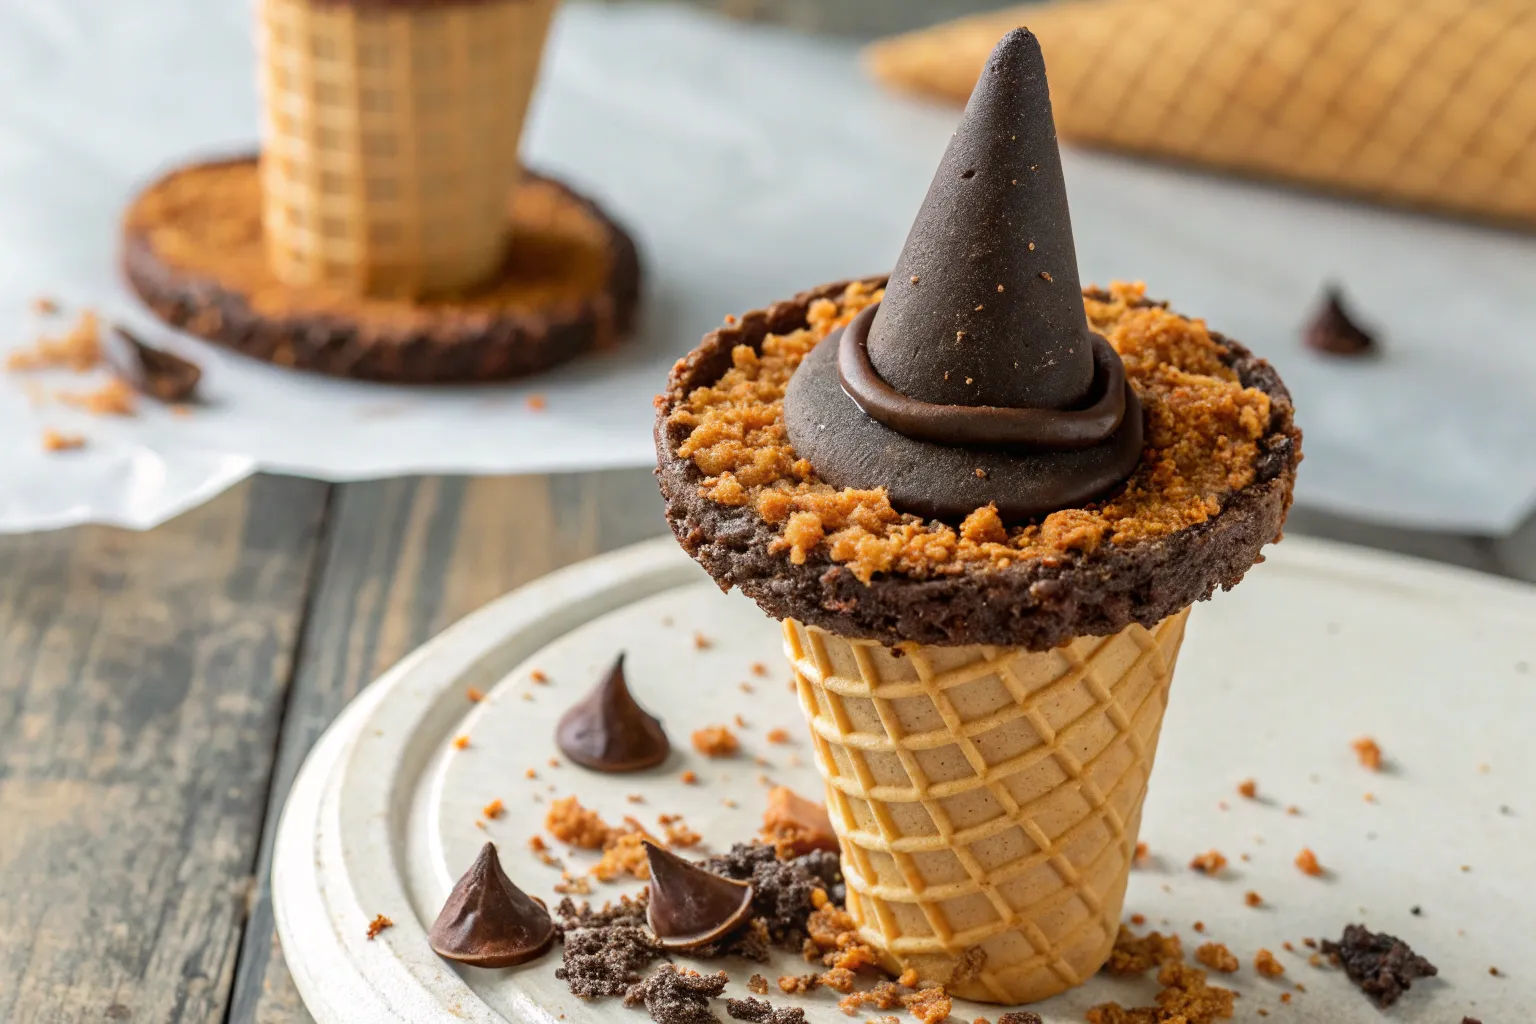
Witch Hat Cookie Cones
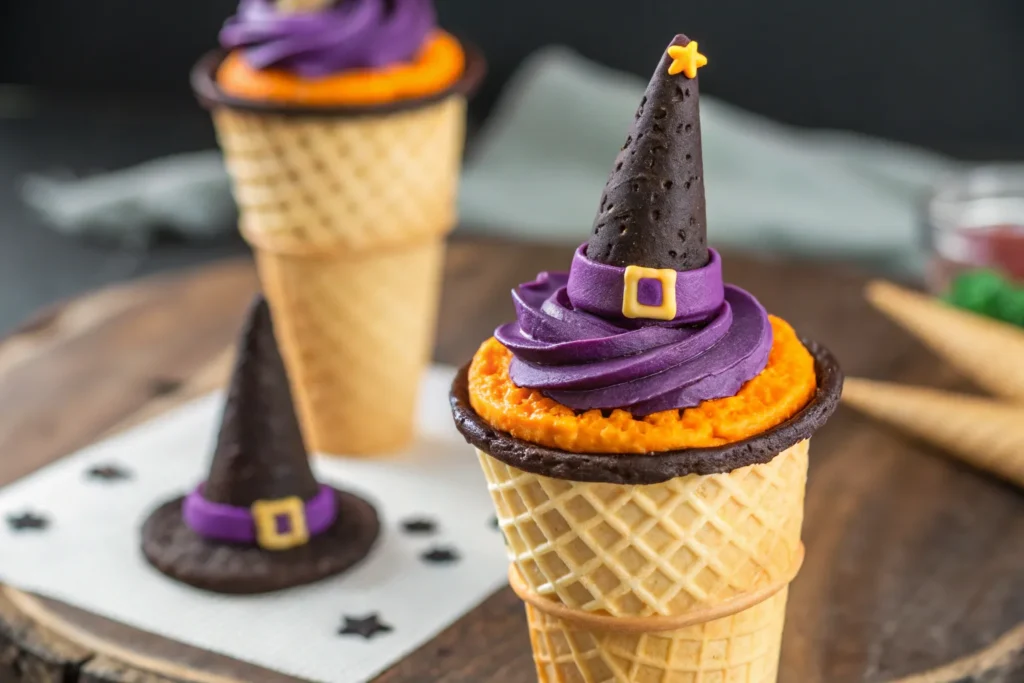
Witch Hat Cookie Cones are a whimsical, no-bake Halloween treat that combines crunchy cones, chocolate, and cookies into an adorable edible costume accessory. Designed to look like miniature witch hats, these sweet creations are fun for kids, easy for adults, and impressive enough to stand out on any spooky dessert table. Whether you’re hosting a Halloween party, packing festive school treats, or creating a themed movie-night snack, these cones offer charm, crunch, and delicious chocolatey flavor in every bite.
Why You’ll Love This Recipe
You’ll love Witch Hat Cookie Cones because they’re incredibly simple, yet look like something right out of a professional bakery. They require minimal preparation—making them ideal for busy October schedules—and use basic ingredients that are easy to customize. The cones provide a satisfying crunch that pairs perfectly with melted chocolate and cookies, while the colorful decorations allow you to embrace your creative side. They’re fun, festive, and guaranteed to disappear quickly from any dessert spread.
Nutritional Info
These treats are on the indulgent side, filled with chocolate, cookies, and sugar cones. However, portion sizes are small enough that they make a reasonable holiday treat. You can modify the ingredients—such as using dark chocolate, gluten-free cookies, or reduced-sugar cones—if you want a lighter version. Each witch hat provides quick carbs, small amounts of iron from chocolate, and plenty of festive flavor.
Time Taken
These adorable cones come together in just 15–20 minutes, with an additional short chilling time to set the chocolate. They’re perfect as a last-minute Halloween dessert or a kid-friendly cooking activity.
Ingredients
- Sugar cones
- Chocolate wafer cookies or round chocolate cookies
- Melted chocolate or candy melts
- Mini candies or sprinkles
- Colored icing (orange, green, purple, black)
- Optional fillings such as chocolate frosting, peanut butter, or candy
Instructions
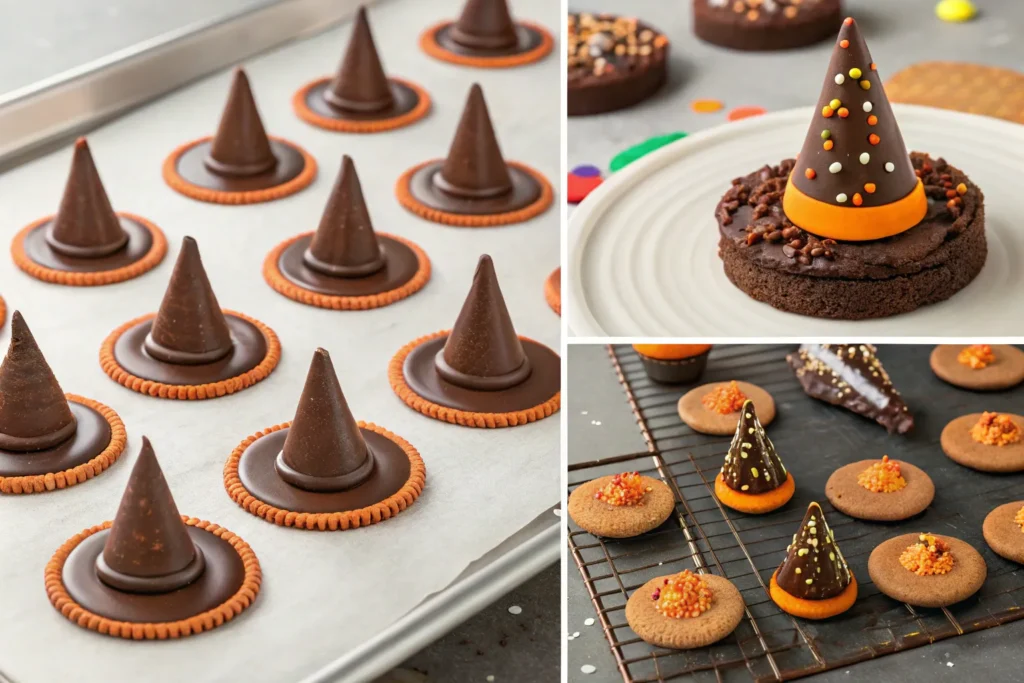
Begin by melting chocolate or candy melts until smooth. Dip the open end of each sugar cone into the chocolate, ensuring an even coating. Press the cone onto a chocolate wafer cookie to form the witch hat shape. Optional: fill the inside of the cones with candy, frosting, or peanut butter for extra surprise. Drizzle or pipe colored icing around the “brim” of the hat, creating decorative bands or buckles. Add sprinkles or mini candies for added detail. Place the hats onto a lined tray and chill until the chocolate sets. Serve and enjoy the spooky crunch.
You Must Know
Make sure the melted chocolate isn’t too hot, or it may weaken the cones. When attaching the cones to the cookies, press gently but firmly so they stick without cracking. If using candy melts, adding a small amount of oil can help achieve a smoother consistency. Be patient during the chilling stage, the cleaner the set, the more polished your witch hats will look.
Storage Tips
Store the decorated cones in an airtight container at room temperature for up to 4 days. Keep them in a cool, dry place to prevent chocolate from melting or cones from softening. Avoid refrigeration unless your environment is hot, as moisture can affect the crispness of the cookies and cones.
Ingredient Substitutions
- Use gluten-free cookies to make this recipe allergy-friendly.
- Swap chocolate wafers for Oreos or any firm round cookie base.
- Replace candy melts with dark, milk, or white chocolate.
- Use edible glitter gel for a more dramatic, magical design.
Serving Suggestions
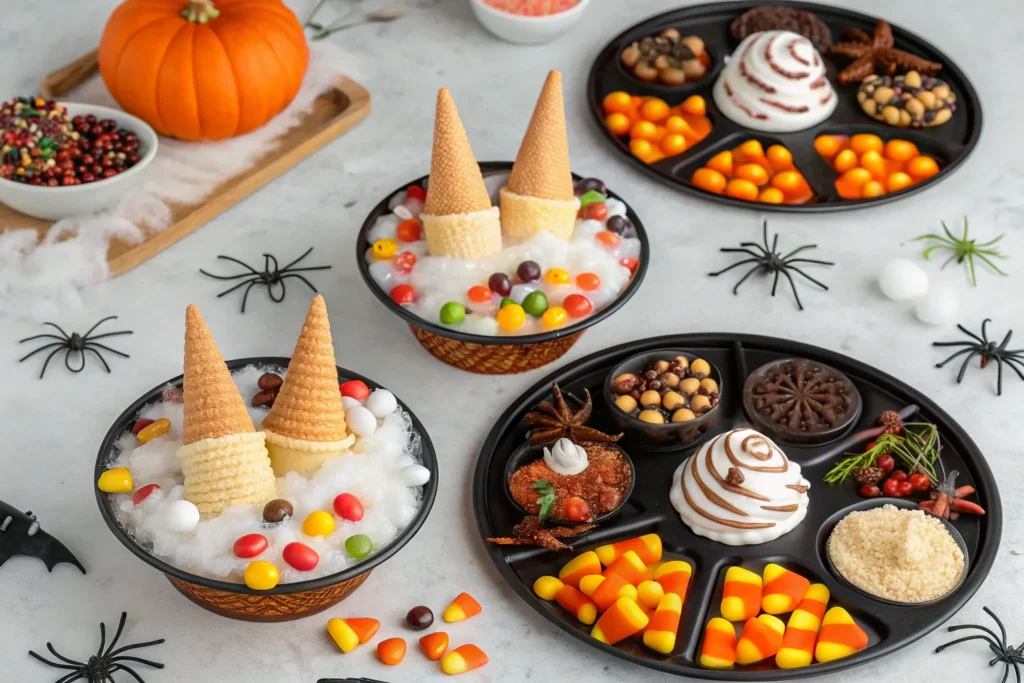
Serve these cones on a Halloween platter with dry ice fog, gummy spiders, or candy corn for a spooky presentation. Add them to school treat bags, display them on cupcakes, or offer them as a fun edible craft project at parties. Pair them with hot chocolate, cider, or a Halloween dessert board for a complete themed experience.
Cultural and Historical Context
Decorative Halloween treats draw from centuries of folklore surrounding witches, harvest festivals, and seasonal celebrations. The pointed witch hat became a widely recognized symbol in the 18th and 19th centuries through literature and illustrations. Modern Halloween baking embraces this imagery, turning iconic symbols into playful treats. Witch Hat Cookie Cones represent this blend of tradition and modern creativity—handheld, charming, and perfect for festive gatherings.
Seasonal Adaptations
Transform these cones for other holidays by changing their decoration. For Christmas, color the chocolate green and turn them into tree cones. For birthdays, use bright sprinkles and rainbow icing. These cones serve as a base for endless themed variations throughout the year.
Success Stories
These treats consistently delight kids and adults alike. Parents appreciate how mess-free and engaging the assembly process is, while party hosts love the visual appeal they bring to dessert tables. Many bakers share that once they try these cones, they quickly become a yearly Halloween must-make.
Pro Tips
- Chill the cones briefly before decorating for a faster set.
- Use a piping bag for clean icing lines and hat bands.
- Fill the cones with candy for a fun surprise center.
Chef’s Special Tips
Dust cocoa powder or black edible shimmer around the cones for a “sooty” enchanted look. Add edible sugar eyes peeking from inside the cone for a mischievous twist. For added elegance, drizzle white chocolate webs across the hats.
Conclusion
Witch Hat Cookie Cones bring magic, creativity, and delicious fun to your Halloween celebrations. With minimal effort and maximum charm, they’re the ideal treat for parties, gifting, or festive snacking. Grab your cones, melt some chocolate, and create a batch of witchy sweets that cast a spell on everyone who tries them.
Frequently Asked Questions
Can I make these Witch Hat Cookie Cones ahead of time?
Yes, they can be made 2–3 days ahead and stored at room temperature.
Do the cones get soggy?
Not if kept in a dry, airtight container; they remain crisp for days.
Can I use white chocolate instead of regular chocolate?
Absolutely, just tint it with gel food coloring for spooky hues.
Can kids help make these?
Yes, this is a perfect hands-on recipe for kids with adult supervision for melting chocolate.
What can I fill the cones with?
Candy, frosting, cookie crumbs, marshmallow fluff, or anything you like.
Can I make them gluten-free?
Yes, simply use gluten-free cookies and cones.
Can I use ice cream cones other than sugar cones?
Sugar cones work best because they have the ideal pointed shape.
Printable Recipe Card
Want just the essential recipe details without scrolling through the article? Get our printable recipe card with just the ingredients and instructions.