Vegan Banana Bread for Breakfast (Moist, Healthy & Eggless)
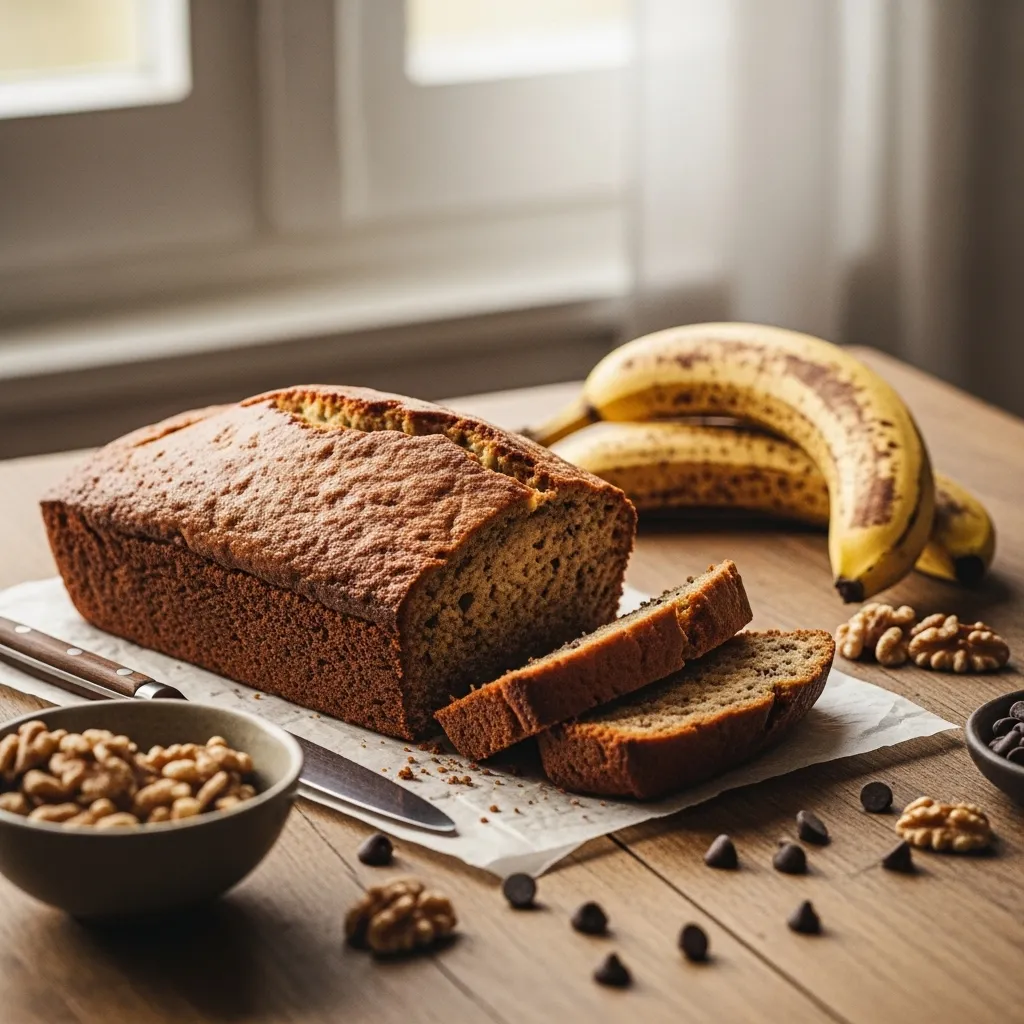
So you’ve got bananas on your counter that have officially crossed the line from snackable to slightly alarming, huh? Perfect. That’s not a problem that’s destiny knocking. Vegan banana bread is basically the universe saying, “Hey, don’t throw those away. Turn them into something amazing instead.” And honestly? This recipe is so chill, it practically makes itself while you stand there feeling accomplished. Apron optional. Pants… also optional.
Why This Recipe is Awesome
First of all, it’s vegan, which means no eggs, no dairy, and zero sad compromises on flavor. It’s moist (yes, we’re using that word), sweet without being tooth-achingly so, and smells like happiness while it bakes.
Second, it’s ridiculously forgiving. Forget exact measurements by a tablespoon? You’re fine. Use a slightly different oil? Still fine. This banana bread has your back. IMO, it’s one of those “trust the vibes” recipes—and somehow it still works.
Third, it’s lazy-friendly. One bowl. No fancy equipment. No weird ingredients you’ll use once and then ignore forever. It’s idiot-proof, and I say that with love… because even I didn’t mess it up.
Ingredients You’ll Need
Here’s the squad. Nothing dramatic, nothing scary.
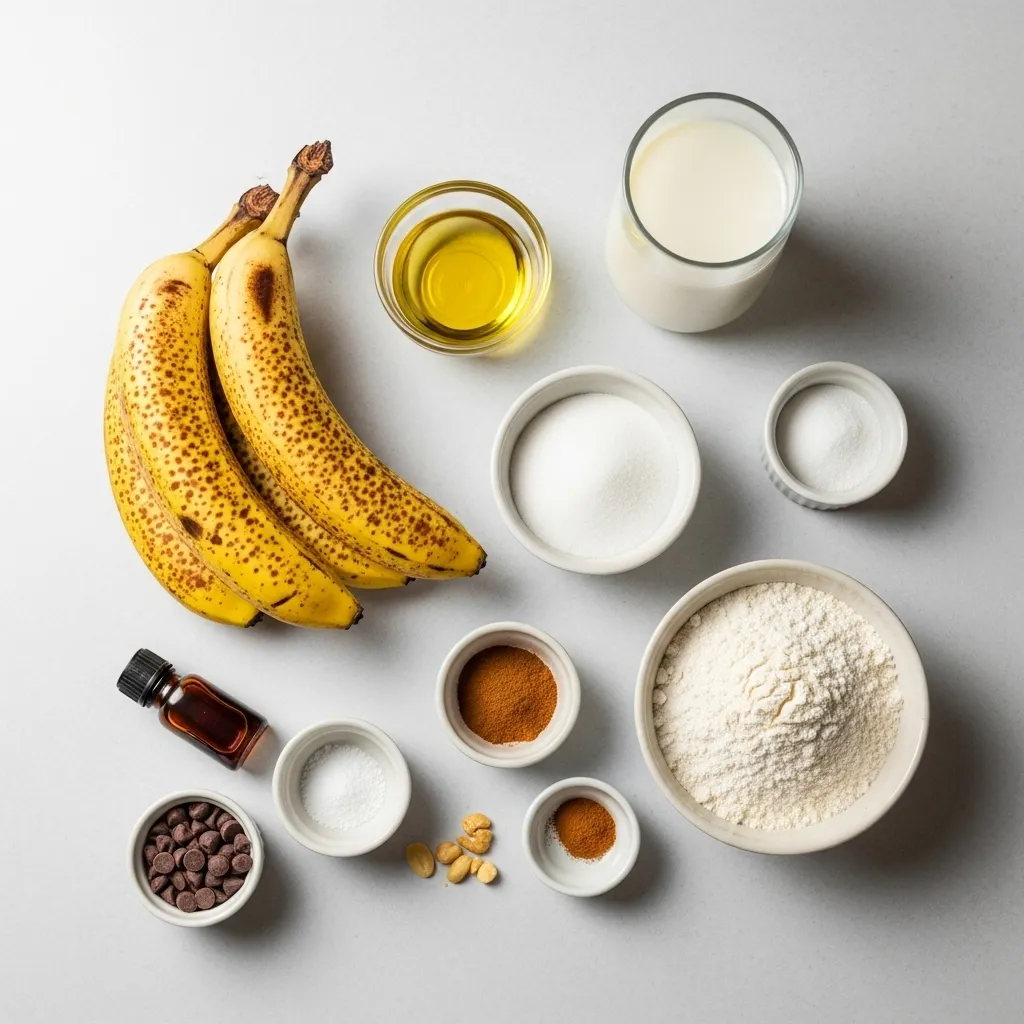
- 3 very ripe bananas – The spottier, the better. If they look ugly, you’re doing it right.
- 1/3 cup neutral oil – Vegetable, canola, melted coconut oil… all welcome here.
- 3/4 cup sugar – White, brown, coconut sugar… live your truth.
- 1/4 cup plant-based milk – Almond, soy, oat, whatever’s in your fridge.
- 1 teaspoon vanilla extract – Because banana + vanilla = besties.
- 1 1/2 cups all-purpose flour – Nothing fancy needed.
- 1 teaspoon baking soda – Not baking powder. Don’t freestyle this part.
- 1/2 teaspoon salt – Trust me, it matters.
- 1 teaspoon cinnamon (optional) – Optional, but also… why skip joy?
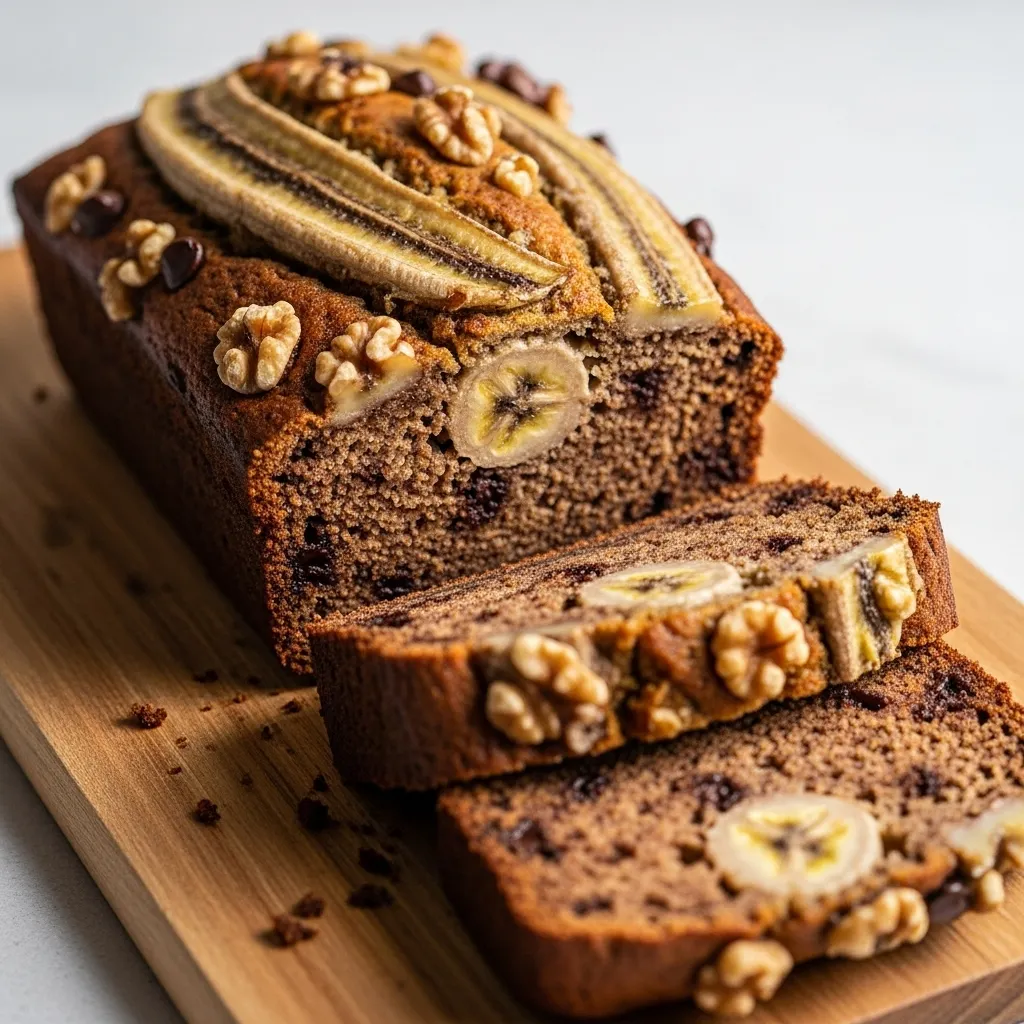
- Optional add-ins – Chocolate chips, walnuts, pecans, or all of the above.
Step-by-Step Instructions
- Preheat your oven to 350°F (175°C).
Do this first. Always. Future-you will thank you when the batter’s ready and the oven isn’t still “thinking about it.” - Mash the bananas in a big bowl.
Use a fork, channel your stress, and mash until mostly smooth. A few small lumps are totally fine—this is banana bread, not a science experiment. - Add the wet ingredients.
Pour in the oil, sugar, plant-based milk, and vanilla. Stir until everything looks well-combined and glossy. At this point, it should smell amazing already. - Sprinkle in the dry ingredients.
Add flour, baking soda, salt, and cinnamon (if using). Stir gently. Don’t overmix—stop as soon as you don’t see dry flour anymore. - Fold in any add-ins.
Chocolate chips? Nuts? Both? Go wild, but don’t overload it. You want banana bread, not trail mix glued together. - Pour into a lined loaf pan.
Smooth the top if you’re feeling fancy. Optional power move: slice a banana lengthwise and place it on top for aesthetic points. - Bake for 50–60 minutes.
Stick a toothpick in the center. If it comes out mostly clean (a few crumbs are fine), you’re golden. - Cool before slicing.
I know, it’s hard. But let it cool at least 15–20 minutes or it’ll crumble like it’s protesting.
Common Mistakes to Avoid
- Using barely ripe bananas.
Yellow bananas are fine. Spotty, borderline gross bananas are better. Sweetness matters. - Overmixing the batter.
Stirring like you’re mad at it will make dense, sad bread. Mix gently. Chill. - Skipping the oven preheat.
Thinking you don’t need to preheat the oven rookie mistake. This isn’t a microwave burrito. - Baking “just to be safe” for way too long.
Dry banana bread is a crime. Check early. Trust the toothpick.
Alternatives & Substitutions
- No oil?
You can swap in unsweetened applesauce (same amount). Texture will be slightly different but still good. - Gluten-free?
Use a 1:1 gluten-free flour blend. Don’t improvise with almond flour unless you enjoy chaos. - Less sugar?
Cut it down to 1/2 cup if your bananas are super ripe. It’ll still taste great. - Feeling fancy?
Add nutmeg, cardamom, or even a splash of espresso. Banana bread can handle it. - Want muffins instead?
Same batter, muffin tin, bake for about 20–25 minutes. Boom portable happiness.
Storage & Shelf Life (How to Keep It Alive Longer)
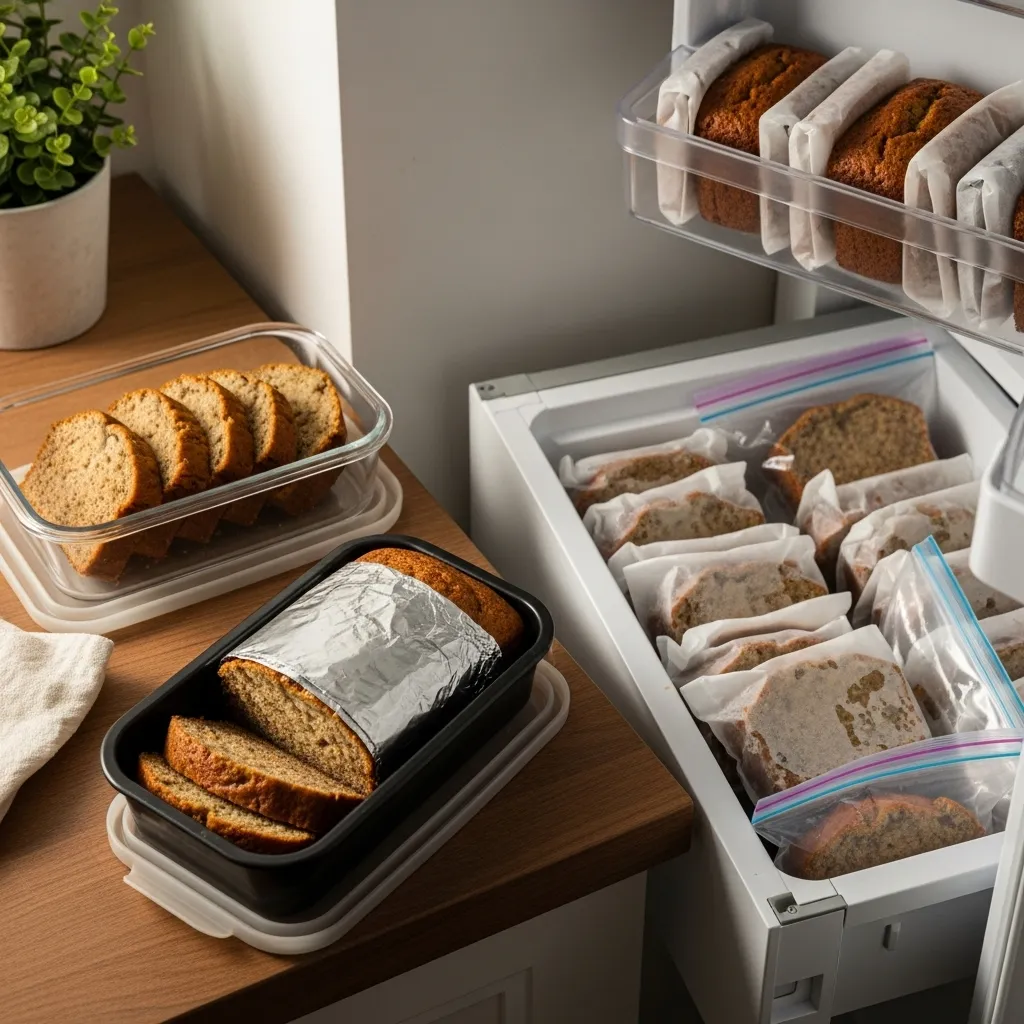
So you baked this glorious vegan banana bread… now what? Staring at it proudly counts, but eventually you’ll want to store it like a responsible adult.
- At room temperature:
Wrap the loaf (or slices) in foil or keep it in an airtight container. It’ll stay happy for 3–4 days. Pro tip: keep it away from direct sunlight unless you enjoy dry bread and regret. - In the fridge:
Want it to last longer? Pop it in the fridge and it’ll survive up to a week. Just know it firms up a bit nothing a quick warm-up can’t fix. - Freezer mode (meal-prep champions only):
Slice it first, wrap slices individually, and freeze for up to 3 months. When cravings hit, grab a slice, thaw, and boom past-you did future-you a solid.
Important: Don’t store it while it’s still warm unless you’re trying to invent soggy banana bread. Let it cool completely. Patience = better texture
Final Thoughts
And there you have it vegan banana bread that’s easy, forgiving, and genuinely delicious. No weird ingredients. No stress. Just cozy, homemade vibes and the smell of success filling your kitchen.
Now go impress someone or just yourself with your new baking skills. Slice it thick, slather on some vegan butter if you’re feeling extra, and enjoy. You’ve earned it.
FAQ (Frequently Asked Questions)
Can I make this without sugar?
Technically yes, but you’ll need a substitute like maple syrup or agave—and the texture will change. Banana bread likes a little sweetness, FYI.
Why is my banana bread gummy in the middle?
Either it’s underbaked or you went wild with the mixing spoon. Let it bake a bit longer and mix less next time.
Can I freeze it?
Absolutely. Slice it first, wrap it well, and freeze. Future-you will feel so prepared.
Do I need a stand mixer?
Nope. A bowl and a fork work just fine. This recipe is anti-fancy-equipment.
Can I add peanut butter?
Yes. Swirl a few spoonfuls on top before baking. It’s elite behavior.
How long does it last?
About 3–4 days at room temp, up to a week in the fridge. If it lasts that long, honestly, impressive.
Printable Recipe Card
Want just the essential recipe details without scrolling through the article? Get our printable recipe card with just the ingredients and instructions.