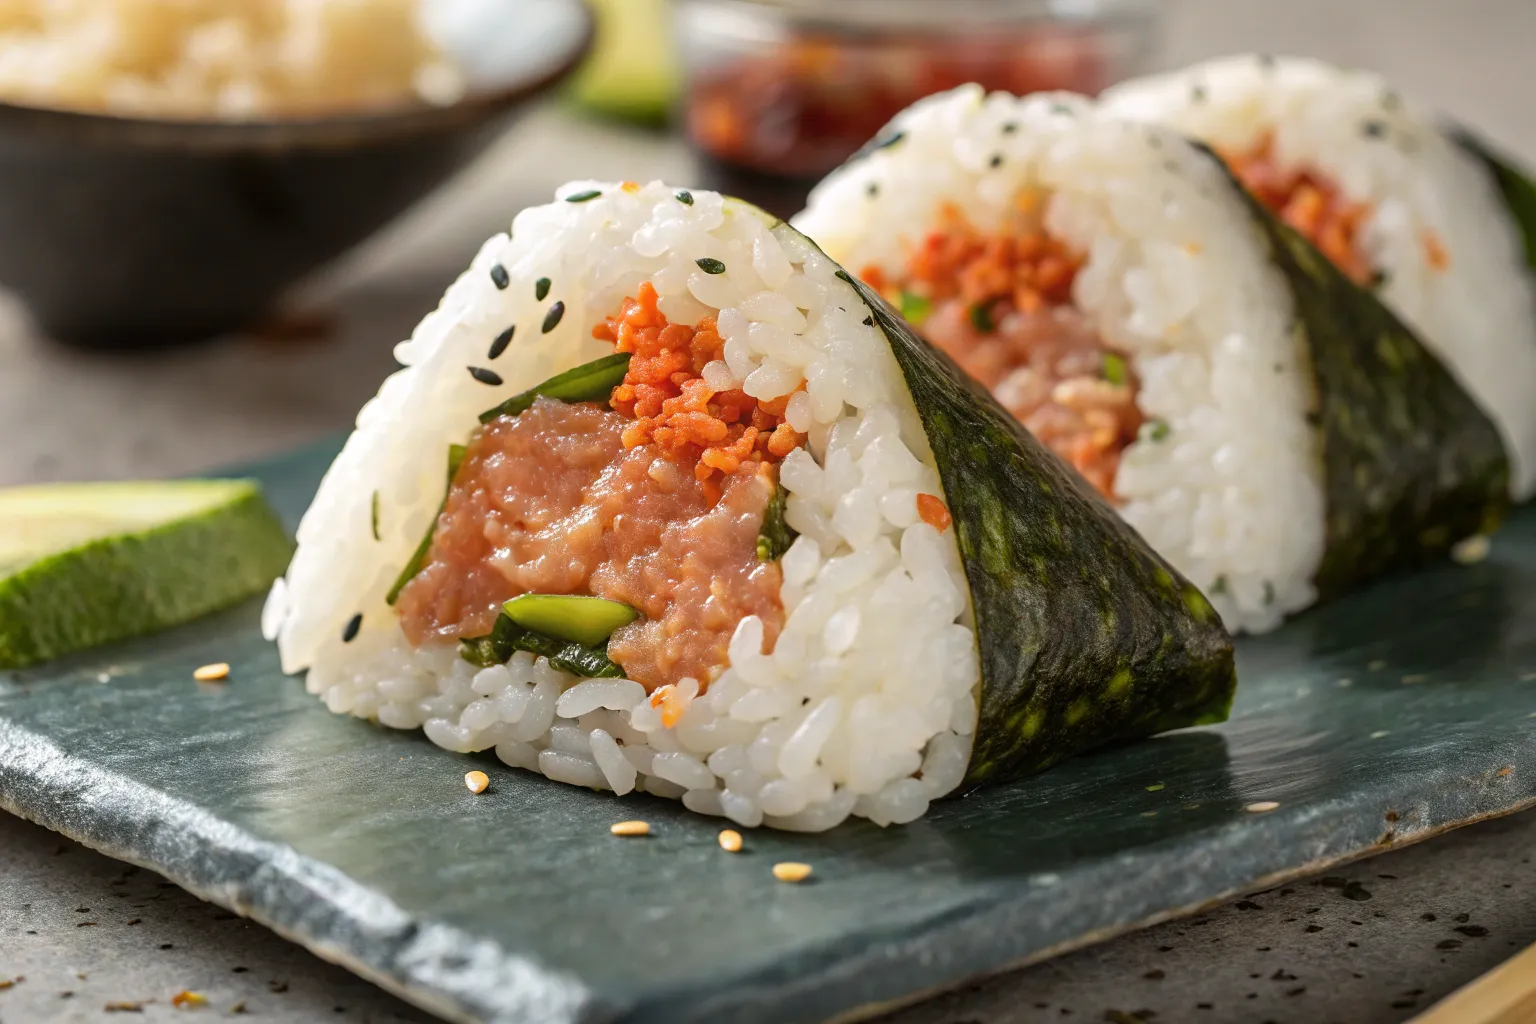
Spicy Tuna Onigiri Recipe
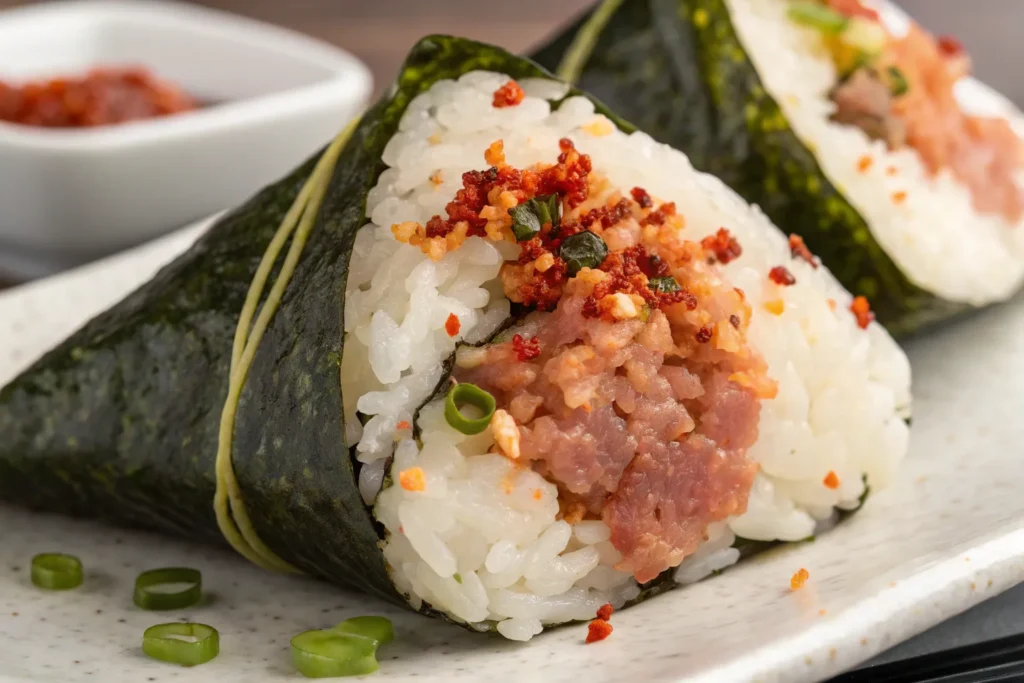
Onigiri, also known as Japanese rice balls, are one of Japan’s most beloved comfort foods. This Spicy Tuna Onigiri recipe takes the classic onigiri and adds a delicious twist with a creamy, spicy tuna filling wrapped in seaweed. Perfectly portable and satisfying, they make an excellent snack, lunchbox addition, or light meal. Whether you’re new to Japanese cuisine or already a fan, this recipe is simple, flavorful, and a fun way to enjoy homemade Japanese food.
Why You’ll Love This Recipe
Spicy Tuna Onigiri is the kind of snack that balances convenience with incredible flavor. It’s quick to prepare, uses simple ingredients, and is endlessly customizable. The combination of tender rice, savory seaweed, and spicy tuna makes every bite exciting and satisfying. Plus, it’s healthier than many packaged snacks and can be enjoyed warm or chilled.
- Portable and perfect for on-the-go
- Easy to make with simple ingredients
- Flavorful filling with creamy and spicy kick
- Great for meal prep and lunchboxes
- A healthier alternative to processed snacks
Ingredients You’ll Need
This recipe comes together with just a handful of pantry and fridge staples. The base is Japanese short-grain rice, which holds its shape perfectly. The filling is made with canned tuna, mayo, and sriracha for a creamy-spicy flavor. Add nori (seaweed) for wrapping, and you have a complete Japanese snack ready to enjoy.
- 2 cups cooked Japanese short-grain rice (warm)
- 1 can tuna (in water or oil, drained)
- 2 tbsp Japanese mayo (or regular mayo)
- 1–2 tsp sriracha (adjust to taste)
- Salt, to season rice
- 2–3 sheets nori (seaweed), cut into strips
- Optional: sesame seeds, chopped green onions for garnish
Condensed Grocery Checklist
Here’s your quick grab-and-go shopping list to make spicy tuna onigiri without missing a thing.
- Japanese short-grain rice
- Canned tuna
- Japanese mayo or regular mayo
- Sriracha (or chili paste)
- Nori sheets
- Salt
- Optional: sesame seeds, green onions
How to Make – Step by Step

Making onigiri is much easier than it looks, and with just a little practice, you’ll shape them like a pro. The key is slightly warm rice, lightly salted hands, and gentle but firm shaping. Here’s how to assemble this delicious snack:
- Cook short-grain rice and let it cool slightly until warm but not hot.
- In a small bowl, mix tuna, mayo, and sriracha until creamy. Adjust spice level to taste.
- Wet your hands lightly with water and rub a pinch of salt on your palms.
- Take a scoop of rice, flatten it slightly, and place a spoonful of tuna mixture in the center.
- Cover with more rice and gently shape into a triangle or ball.
- Wrap a strip of nori around the bottom or side for easier handling.
- Garnish with sesame seeds or green onions if desired. Serve immediately or pack for later.
Ingredient Swaps & Variations
Onigiri is incredibly versatile, so you can experiment with different fillings and seasonings to suit your taste. If you don’t like spice, there are plenty of milder alternatives. You can also add fun toppings to make them visually appealing for kids or gatherings.
- Use salmon instead of tuna for a different flavor
- Swap sriracha with wasabi for a different kind of heat
- Try kimchi, pickled veggies, or teriyaki chicken as fillings
- Add furikake seasoning to rice for extra flavor
- Make mini bite-sized versions for party appetizers
Serving Suggestions
Spicy Tuna Onigiri can be enjoyed in many ways—whether it’s part of a bento box, a quick lunch, or a picnic snack. They’re versatile enough to pair with soups, salads, or other Japanese dishes. Because they’re so portable, they’re also great for travel or school lunches.
- Serve with miso soup for a comforting meal
- Pair with a side of edamame for added protein
- Pack into lunchboxes as a filling snack
- Enjoy with pickled vegetables for contrast
- Serve alongside sushi rolls for variety
Storing Tips
Onigiri is best enjoyed fresh, but with a few tips, you can store them for later without losing too much texture. The key is keeping the rice moist and preventing the nori from becoming soggy. If you’re making them ahead, store rice and nori separately until ready to eat.
- Wrap individually in plastic wrap for up to 24 hours at room temperature
- Refrigerate for up to 2 days, but allow them to come to room temperature before eating
- Store nori separately and wrap before serving to keep it crisp
- For longer storage, freeze plain rice balls without filling, then thaw and fill later
Chef’s Special Tips

A few expert tricks can make your Spicy Tuna Onigiri taste even better and look like they came from a Japanese convenience store. These little touches enhance both flavor and presentation.
- Use freshly cooked short-grain rice for best stickiness and shape
- Salt your hands lightly before shaping—it seasons the rice and prevents sticking
- Keep a small bowl of water nearby to re-wet your hands as you shape each onigiri
- Wrap nori just before serving to keep it crisp
- For extra flavor, mix sesame seeds into the rice before shaping
Conclusion
Spicy Tuna Onigiri is a fun, delicious, and easy way to bring a taste of Japan into your kitchen. With soft rice, a creamy spicy filling, and the umami crunch of nori, these rice balls are as satisfying as they are portable. They’re perfect for busy days, packed lunches, or cozy nights when you want something comforting yet quick. Once you try them, you’ll see why onigiri has been a staple in Japanese cuisine for generations.