
Chocolate Peanut Butter Balls – Easy 4-Ingredient Treat
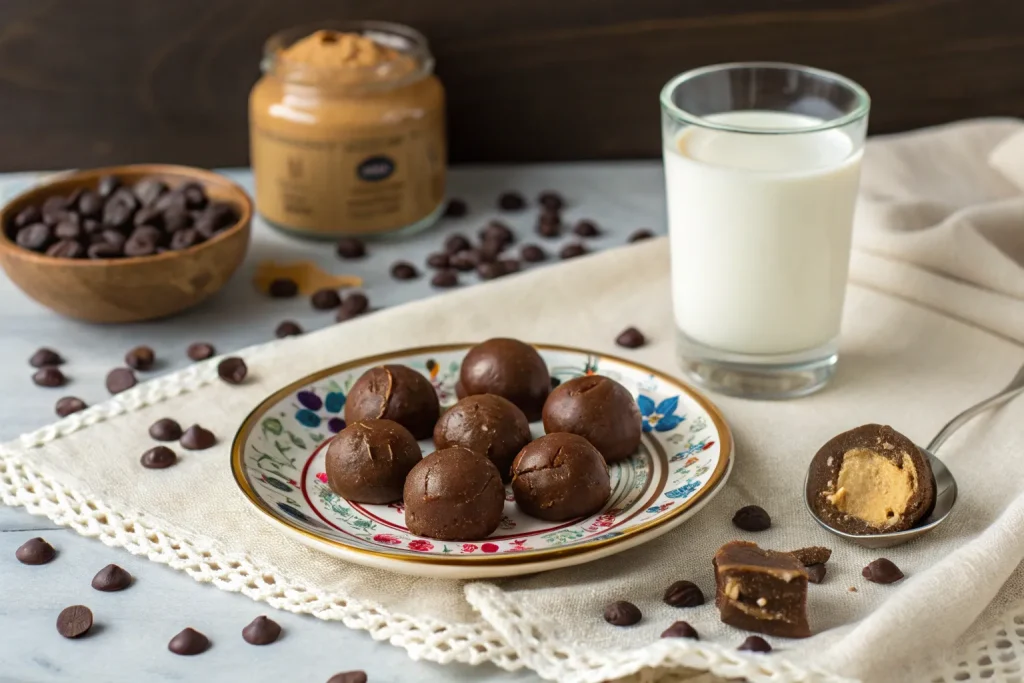
Few desserts hit the sweet spot like these Chocolate Peanut Butter Balls. With their creamy, nutty center and rich chocolate coating, they’re everything you love about peanut butter cups—just in poppable, no-bake form. And the best part? You only need four simple ingredients and a little chill time to pull these off. Perfect for holiday trays, potlucks, or anytime cravings, this classic combo of chocolate and peanut butter is always a crowd-pleaser.
Why You’ll Love These Peanut Butter Balls
These treats check all the boxes: easy, minimal ingredients, no baking, and addictively delicious. The peanut butter filling is sweet and smooth with just the right amount of texture from the powdered sugar, while the outer shell gives you that satisfying chocolate snap. They’re ideal for making ahead, freezing, or gifting—plus they come together in less than 30 minutes of hands-on time. If you’re looking for a treat that feels fancy but is secretly effortless, this one’s for you.
Ingredients You’ll Need
This recipe keeps things incredibly simple with only four pantry staples. Choose high-quality chocolate for best results, and opt for a creamy peanut butter that’s not too runny or oily—traditional shelf-stable brands work great.
- 1 cup creamy peanut butter (not natural or oily)
- 2 cups powdered sugar, sifted
- 2 tbsp unsalted butter, softened
- 10 oz semi-sweet or dark chocolate chips (or chocolate melting wafers)
Optional: Add a pinch of salt or a splash of vanilla extract for extra flavor.
How Long It Takes
These chocolate peanut butter balls come together in just a few steps and can be made ahead. While they do need some chill time to set, the actual prep is quick and low-effort.
- Prep Time: 25 minutes
- Chill Time: 30–60 minutes
- Total Time: About 1 hour
Step-by-Step Instructions
Making peanut butter balls is as easy as mix, roll, chill, and dip. Here’s exactly how to make them turn out smooth, creamy, and perfectly coated every time.
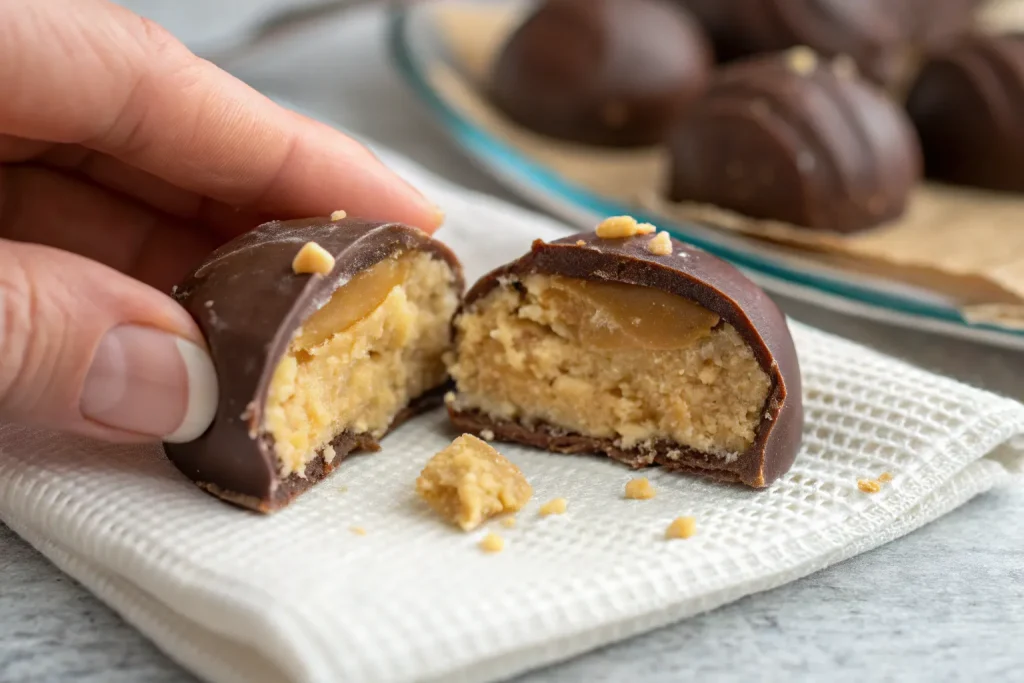
- Mix the filling: In a medium bowl, combine peanut butter, softened butter, and powdered sugar. Stir until smooth and thick. The mixture should be soft but not sticky—add a bit more sugar if needed.
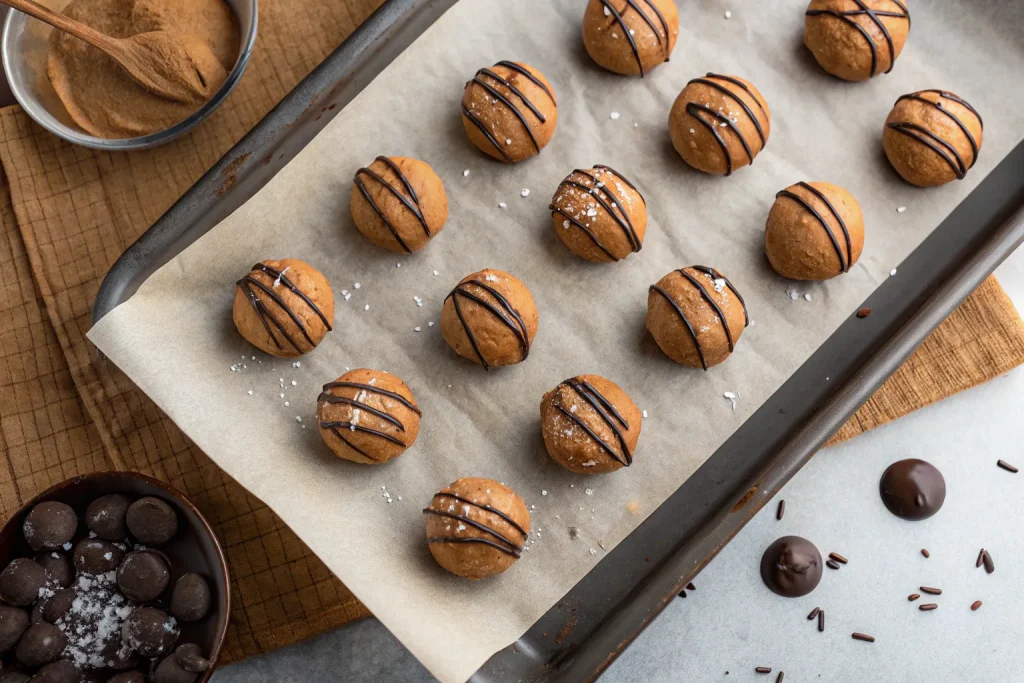
- Roll into balls: Scoop about 1 tablespoon of the mixture and roll into a ball. Place on a parchment-lined baking sheet.
- Chill: Refrigerate or freeze the balls for at least 30 minutes to firm up. This helps them hold shape when dipping.
- Melt the chocolate: In a microwave-safe bowl, melt the chocolate in 30-second intervals, stirring until smooth.
- Dip and coat: Use a fork or toothpick to dip each ball into the melted chocolate, tapping off the excess. Return to the lined tray.
- Set: Let the chocolate harden at room temperature or refrigerate until firm. Store in an airtight container.
Fun Variations to Try
While the classic version is delicious on its own, this recipe is easy to customize for the season or your preferences. A few tweaks can turn these into festive holiday bites or elevated gourmet treats.
- Top with flaky sea salt for a sweet-salty contrast
- Sprinkle with crushed peanuts or toffee bits for crunch
- Add rice cereal to the filling for texture
- Use white or milk chocolate instead of dark
- Swirl melted chocolate and peanut butter on top for decoration
- Dip only halfway for a two-tone look
Storage & Freezing Tips
One of the best things about these peanut butter balls is how well they store. You can make them ahead for parties, snacks, or gift bags and they’ll keep their texture and flavor beautifully.
- Refrigerate in an airtight container for up to 2 weeks
- Freeze for up to 2 months—thaw in the fridge before serving
- Keep chilled if serving at a warm event to prevent melting
Make It Kid-Friendly
These no-bake peanut butter balls are perfect for getting kids involved in the kitchen. The mixing, rolling, and dipping make it a fun, hands-on activity with delicious rewards at the end.
- Let kids help with rolling and decorating
- Use colorful sprinkles or mini M&Ms on top
- Substitute almond butter or sunflower seed butter for allergies
- Shape into hearts, eggs, or other fun forms for holidays
Chef’s Tips for Success
A few simple tricks can help your peanut butter balls look as good as they taste. Here’s how to get that smooth, pro-level finish:
- Chill thoroughly before dipping to avoid mess and help chocolate set quickly
- Use a fork or candy dipper for clean edges when coating in chocolate
- Thin chocolate with a touch of coconut oil if too thick
- Tap off excess chocolate before setting on the tray to avoid pooling
- Let them set at room temp for a shinier finish (fridge can dull the chocolate)
Final Thoughts – Your Go-To No-Bake Sweet
Chocolate peanut butter balls are proof that simple can be spectacular. With just a few pantry staples and a little chill time, you get a decadent, poppable treat that’s as satisfying as it is easy. Whether you’re prepping dessert trays or just treating yourself, these are the kind of sweet bites that disappear fast. Keep a batch in the fridge—you’ll be glad you did.
FAQs
Printable Recipe Card
Want just the essential recipe details without scrolling through the article? Get our printable recipe card with just the ingredients and instructions.