Easy DIY Cotton Candy Without a Machine at Home
Skip the carnival lines and make fluffy cotton candy in your own kitchen. This simple method uses basic tools and common ingredients, so you can whip it up anytime a craving hits. It’s a fun weekend project with kids, or a nostalgic treat for movie night.
The trick is making a quick sugar syrup and spinning it into wispy strands no fancy machine needed. With a bit of practice, you’ll get light, airy clouds that taste just like the fair.
Why This Recipe Works
This method mimics how cotton candy machines work: hot sugar is transformed into ultra-thin threads that cool instantly. By heating sugar to the right stage and whisking it across a surface, you create those signature airy strands.
A simple whisk or fork becomes your “spinner,” and parchment acts as your collection surface. With the right temperature and quick motions, you’ll get fluffy results without special equipment.
Shopping List
- Granulated sugar (the base for the candy)
- Light corn syrup (helps prevent crystallization)
- Water
- Vanilla extract or other clear flavoring
- Gel food coloring (optional, pastel shades work best)
- Nonstick cooking spray or neutral oil (for tools)
- Parchment paper or a large silicone mat
Instructions
- Prep your station. Line a large counter or table with parchment paper or a silicone mat. Lightly oil the surface and the handles of a large whisk (or two forks held together).Set out a small bowl for testing syrup and a heatproof measuring cup if you prefer to pour.
- Make the sugar syrup. In a medium heavy saucepan, combine 1 cup granulated sugar, 1/3 cup light corn syrup, and 1/3 cup water. Stir just until the sugar is moistened. Wipe any sugar crystals from the pan’s sides with a wet pastry brush to prevent graininess.
- Heat without stirring. Bring to a boil over medium heat.Clip on a candy thermometer. Cook until the syrup reaches 300–310°F (hard crack stage). If you don’t have a thermometer, drip a little syrup into cold water it should form brittle threads that snap.
- Add color and flavor. Remove from heat.Wait 15–20 seconds for the bubbles to settle. Stir in a drop or two of gel coloring and 1/4 teaspoon vanilla or your chosen extract. Avoid too much liquid, which can soften the strands.
- Cool briefly for spinning. Let the syrup thicken for 1–2 minutes until it flows like warm honey.If it’s too runny, strands won’t form; too thick, and it will clump. You’re aiming for a slow, steady drizzle.
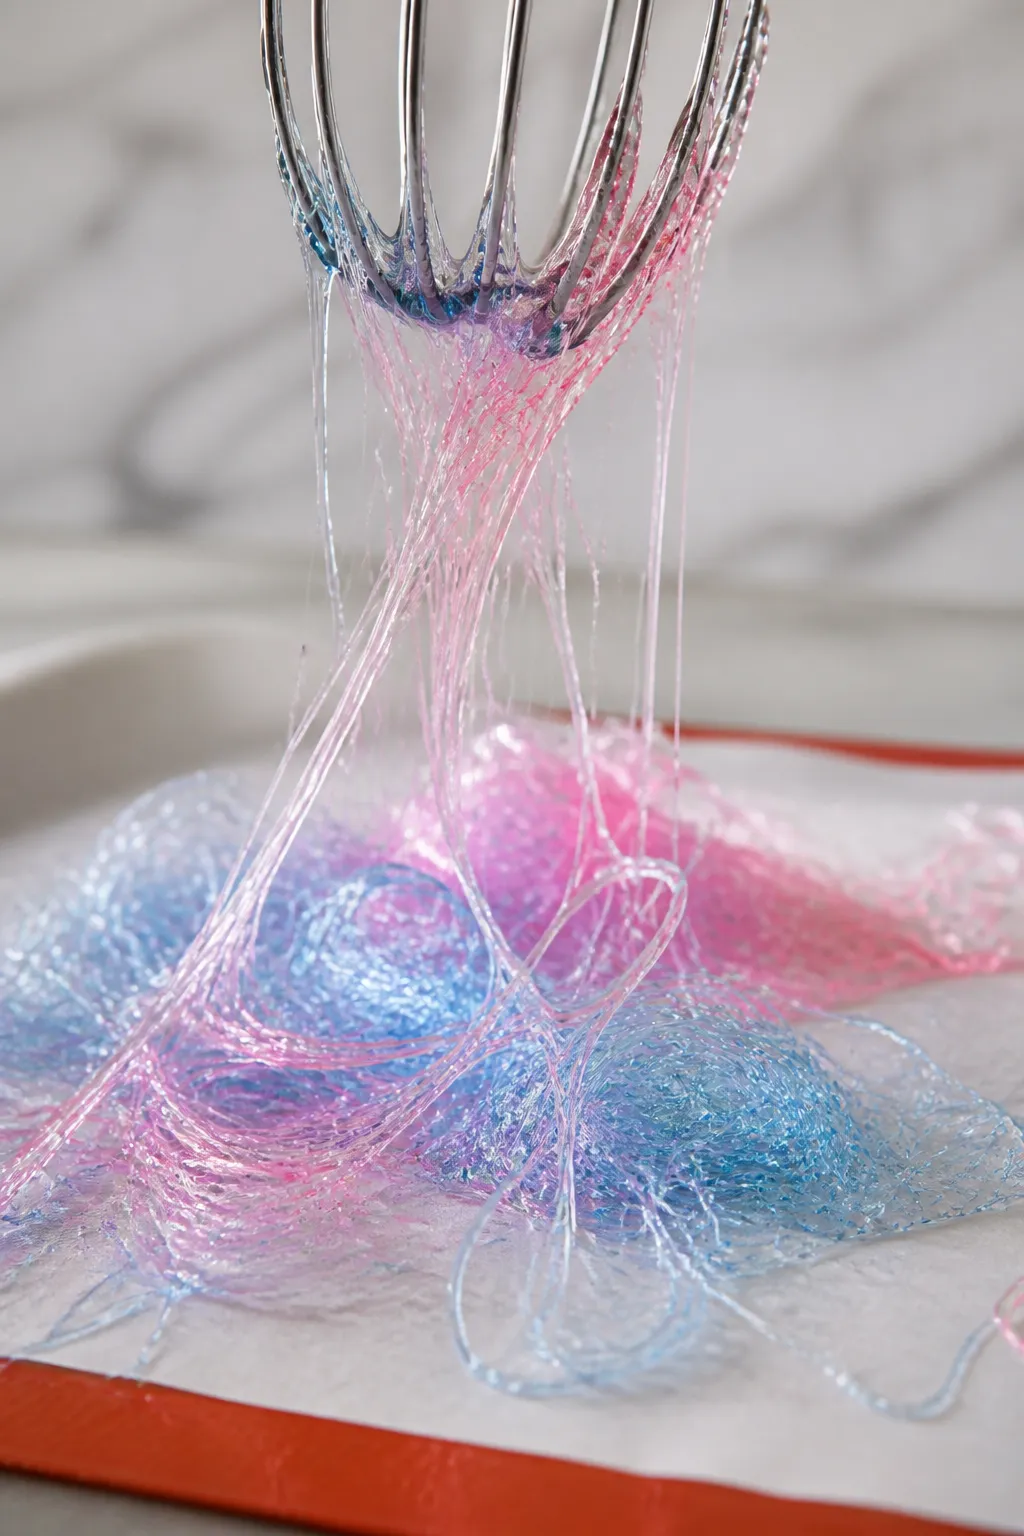
- Load your “spinner.” Dip the whisk tips into the syrup, then tap off any heavy drips. Hold the whisk a foot above the parchment.
- Spin the strands. With quick, sweeping motions of your wrist, flick the whisk back and forth so thin threads fly onto the parchment.Think “paint splatter,” but gentle. Move your arm in circles and figure-eights to build airy piles.
- Form a cloud. Use your fingers to gather the threads into a loose ball. If they’re sticky, let them sit 15–30 seconds to set.Repeat dipping and spinning until you have several fluffy mounds.
- Adjust as needed. If strands are thick or sticky, the syrup is too hot wait another 20–30 seconds. If the syrup becomes too thick to spin, warm it gently over low heat for 10–20 seconds to loosen.
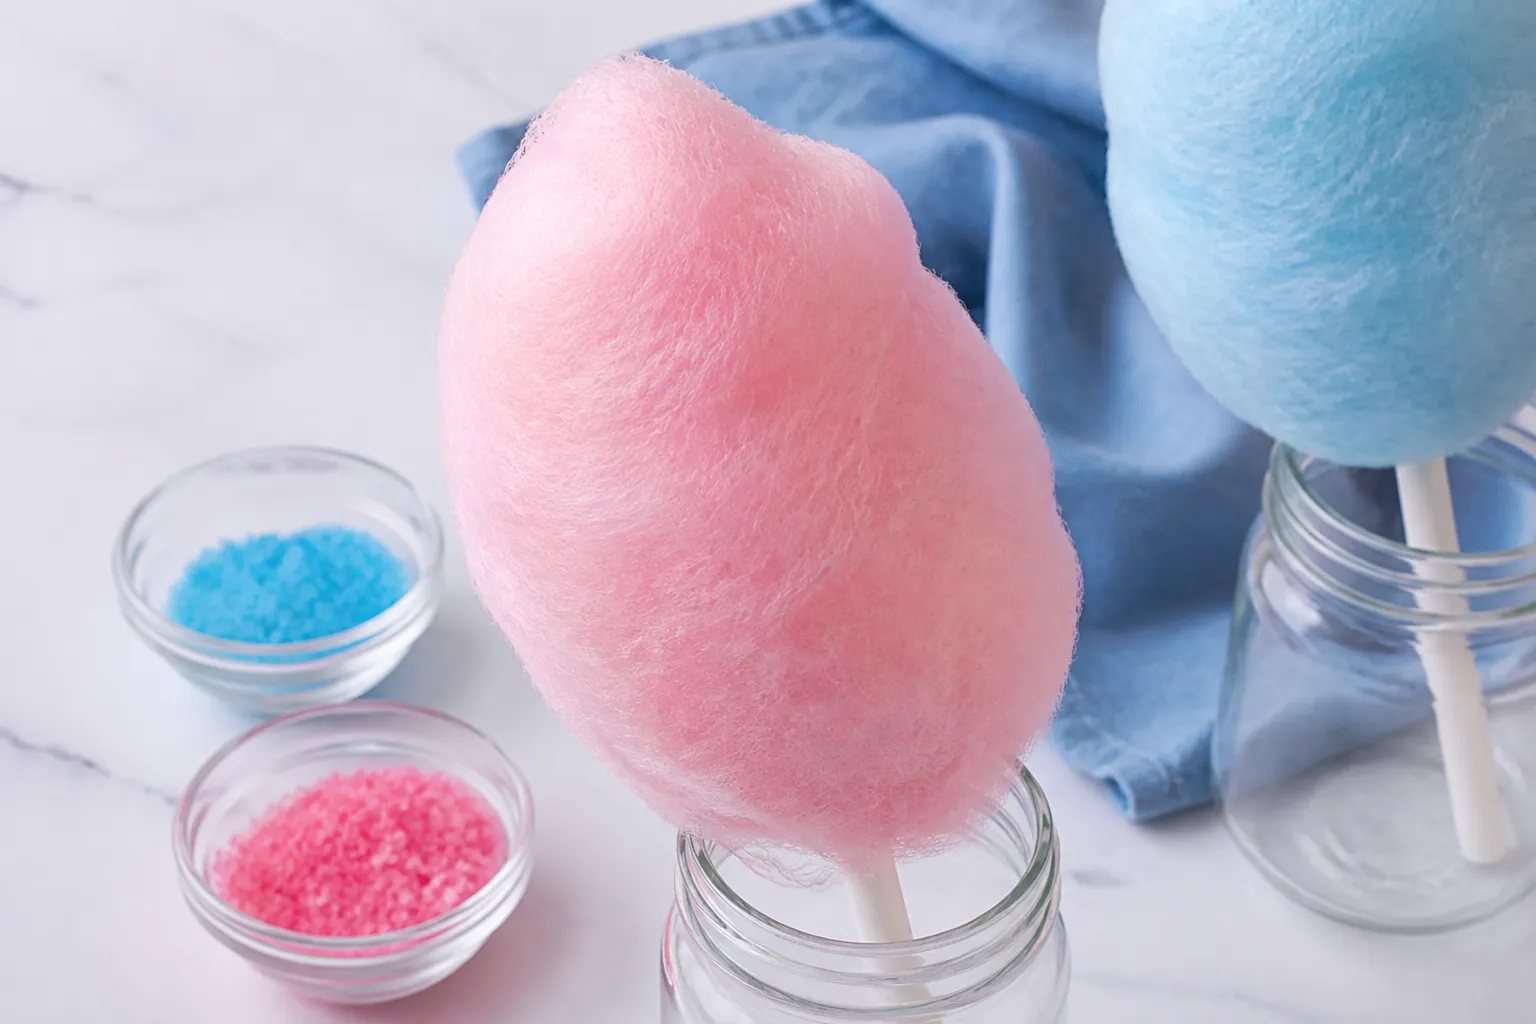
- Serve right away. Place cotton candy on sticks, cones, or cupcakes. Enjoy immediately for the best texture.
How to Store
Fresh is best. If you need to store it, place the cotton candy in an airtight container with a sheet of parchment, and keep it in a cool, dry spot. Avoid the fridge it adds moisture and melts the strands. Properly stored, it stays fluffy for 6–8 hours, sometimes up to a day in low humidity.
Health Benefits
- Portion control: Making it at home helps you control serving size.
- Fewer additives: You choose the coloring and flavor, or skip them entirely.
- Allergen-friendly: Naturally gluten-free and dairy-free if you use simple ingredients.
That said, this is a treat mostly sugar. Enjoy in small portions and pair with water to protect your teeth.
Common Mistakes to Avoid
- Skipping the thermometer: Guessing the temperature often leads to sticky, dull strands. Aim for 300–310°F.
- High humidity: Moist air melts cotton candy. Work on a dry day or run a dehumidifier.
- Over-stirring the syrup: Stir only at the beginning.After it boils, stirring can cause crystallization.
- Too much liquid flavor or color: Excess liquid softens strands. Use gel color and minimal extract.
- Spinning too close to the surface: Hold the whisk higher to get finer, floaty threads.
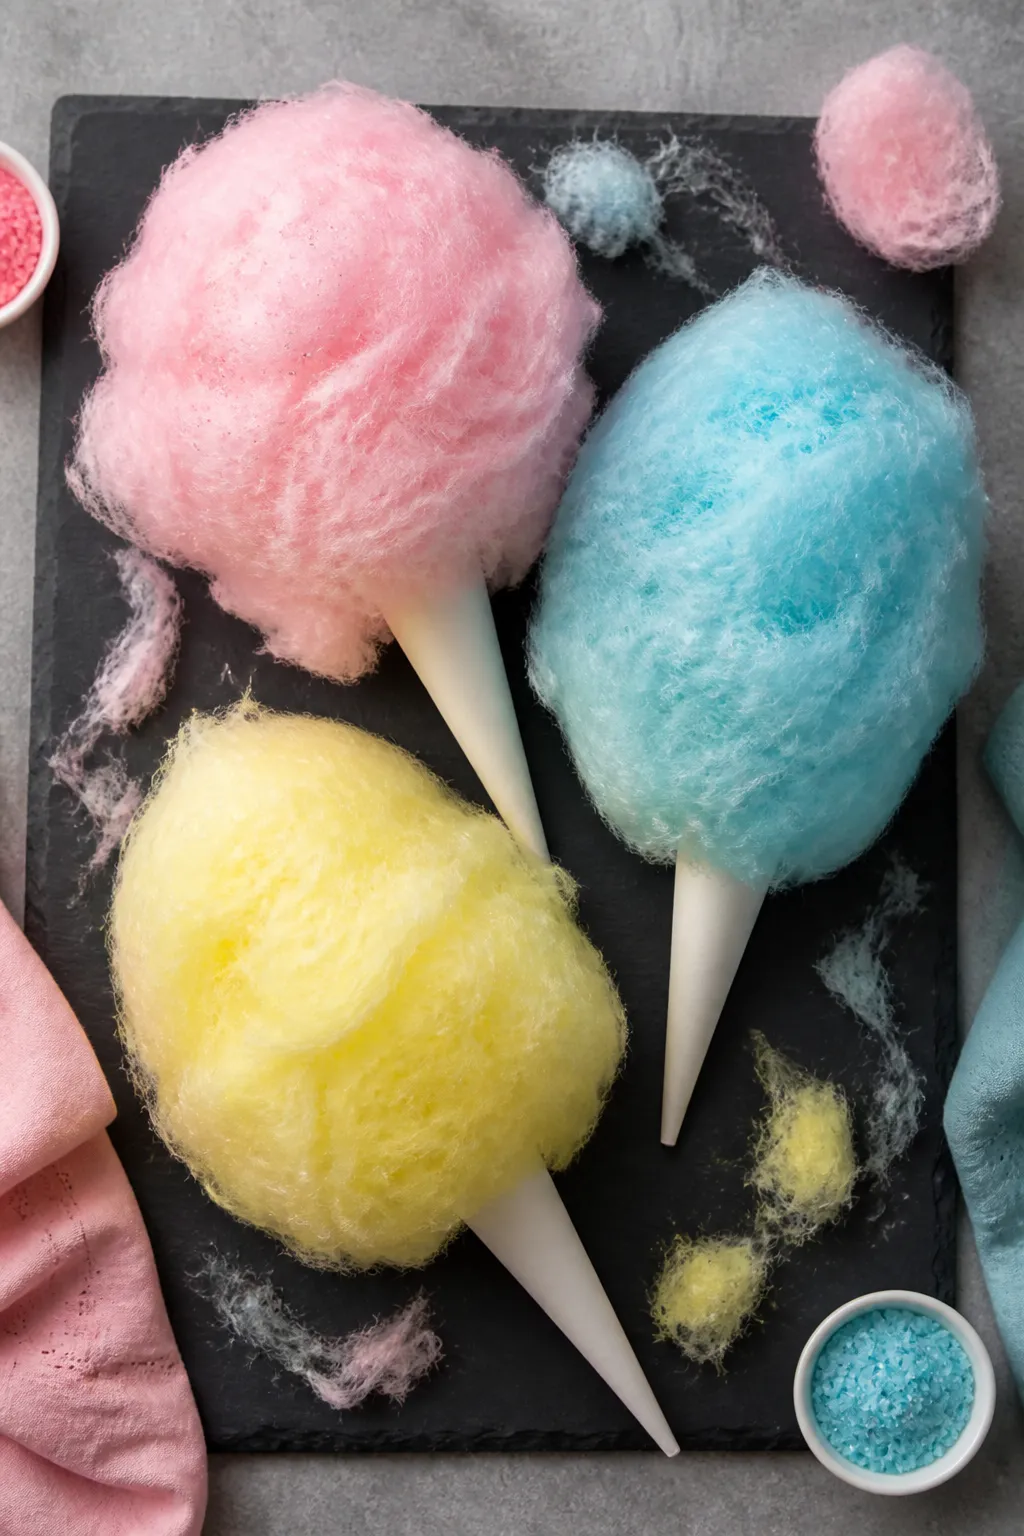
Variations You Can Try
- Classic pink vanilla: A drop of pink gel and vanilla extract.
- Blue raspberry: Blue gel color with raspberry extract.
- Citrus twist: Yellow gel with lemon or orange extract for a bright, zesty note.
- Two-tone swirls: Divide the syrup after cooking and color each half differently; spin alternately.
- Sparkle sugar: Lightly dust finished clouds with edible glitter for party flair.
FAQ
Can I make this without corn syrup?
Yes, but it’s trickier. Corn syrup helps prevent crystals. You can swap in glucose syrup or add 1/8 teaspoon cream of tartar to the sugar and water to reduce crystallization. Work carefully and avoid stirring after the boil.
What can I use instead of a whisk?
Two forks held together back-to-back or bamboo skewers bundled with a rubber band can work. Lightly oil the tips so the syrup releases into fine threads.
Why did my cotton candy turn sticky fast?
Humidity is the usual culprit, or the syrup was a bit under temperature. Make sure you hit the hard crack stage and work in a dry room. Store finished candy in an airtight container right away.
Is food coloring necessary?
No. Plain, uncolored cotton candy tastes great and spins the same. If you use color, go for gel or powdered options to avoid extra moisture.
Can kids help?
They can help with shaping and decorating, but keep them away from the hot syrup. Assign them to gather strands once they cool and to choose colors and flavors.
Can I double the recipe?
It’s better to make multiple small batches. The syrup firms up as it sits, so smaller amounts are easier to manage and spin into fine strands.
Wrapping Up
Homemade cotton candy is totally doable with pantry staples and a whisk. Get the sugar to the right stage, keep your motions quick and light, and you’ll pull off fluffy, fairground-style clouds. It’s a playful treat that turns any evening into a mini celebration. Keep it dry, enjoy it fresh, and have fun experimenting with flavors and colors.
Ingredients
Method
- Prep your station. Line a large counter or table with parchment paper or a silicone mat. Lightly oil the surface and the handles of a large whisk (or two forks held together). Set out a small bowl for testing syrup and a heatproof measuring cup if you prefer to pour.
- Make the sugar syrup. In a medium heavy saucepan, combine 1 cup granulated sugar, 1/3 cup light corn syrup, and 1/3 cup water. Stir just until the sugar is moistened. Wipe any sugar crystals from the pan’s sides with a wet pastry brush to prevent graininess.
- Heat without stirring. Bring to a boil over medium heat. Clip on a candy thermometer. Cook until the syrup reaches 300–310°F (hard crack stage). If you don’t have a thermometer, drip a little syrup into cold water—it should form brittle threads that snap.
- Add color and flavor. Remove from heat. Wait 15–20 seconds for the bubbles to settle. Stir in a drop or two of gel coloring and 1/4 teaspoon vanilla or your chosen extract. Avoid too much liquid, which can soften the strands.
- Cool briefly for spinning. Let the syrup thicken for 1–2 minutes until it flows like warm honey. If it’s too runny, strands won’t form; too thick, and it will clump. You’re aiming for a slow, steady drizzle.
- Load your “spinner.” Dip the whisk tips into the syrup, then tap off any heavy drips. Hold the whisk a foot above the parchment.
- Spin the strands. With quick, sweeping motions of your wrist, flick the whisk back and forth so thin threads fly onto the parchment. Think “paint splatter,” but gentle. Move your arm in circles and figure-eights to build airy piles.
- Form a cloud. Use your fingers to gather the threads into a loose ball. If they’re sticky, let them sit 15–30 seconds to set. Repeat dipping and spinning until you have several fluffy mounds.
- Adjust as needed. If strands are thick or sticky, the syrup is too hot—wait another 20–30 seconds. If the syrup becomes too thick to spin, warm it gently over low heat for 10–20 seconds to loosen.
- Serve right away. Place cotton candy on sticks, cones, or cupcakes. Enjoy immediately for the best texture.
Printable Recipe Card
Want just the essential recipe details without scrolling through the article? Get our printable recipe card with just the ingredients and instructions.