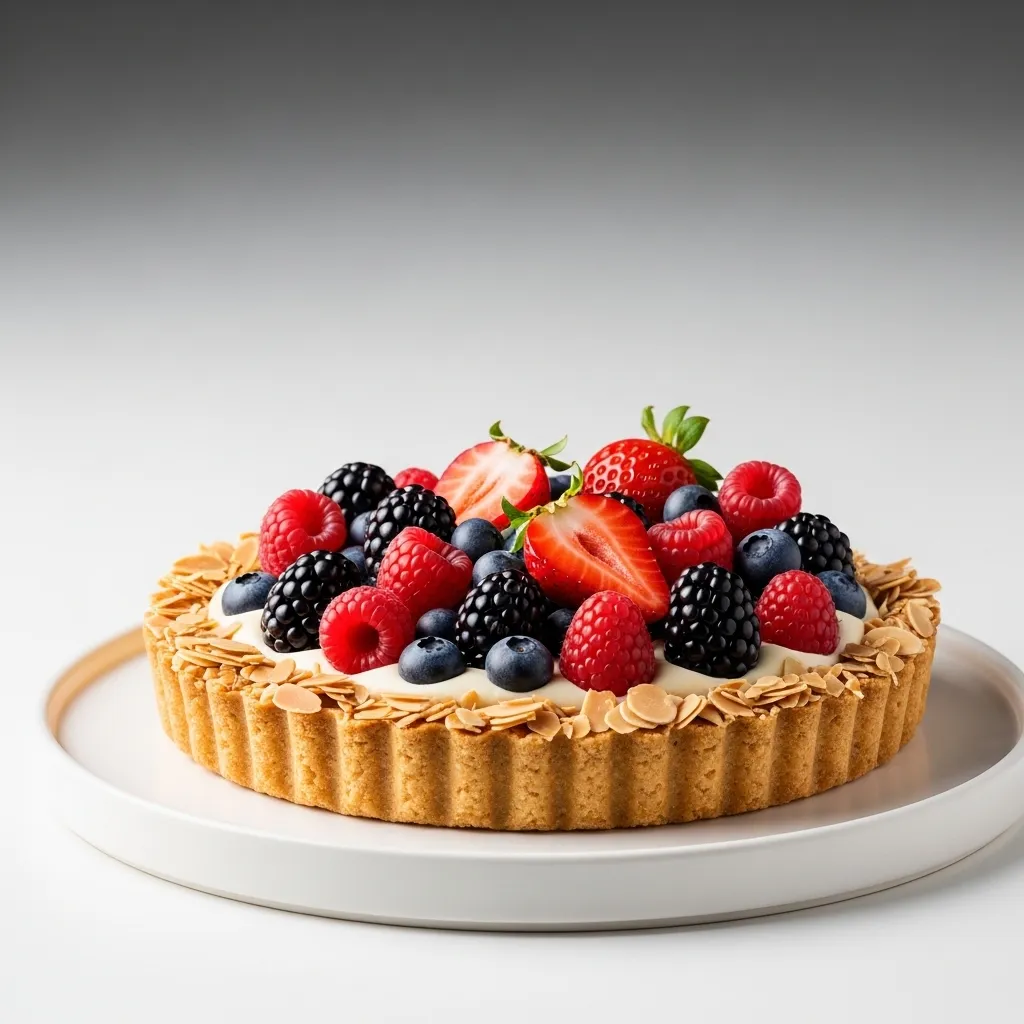
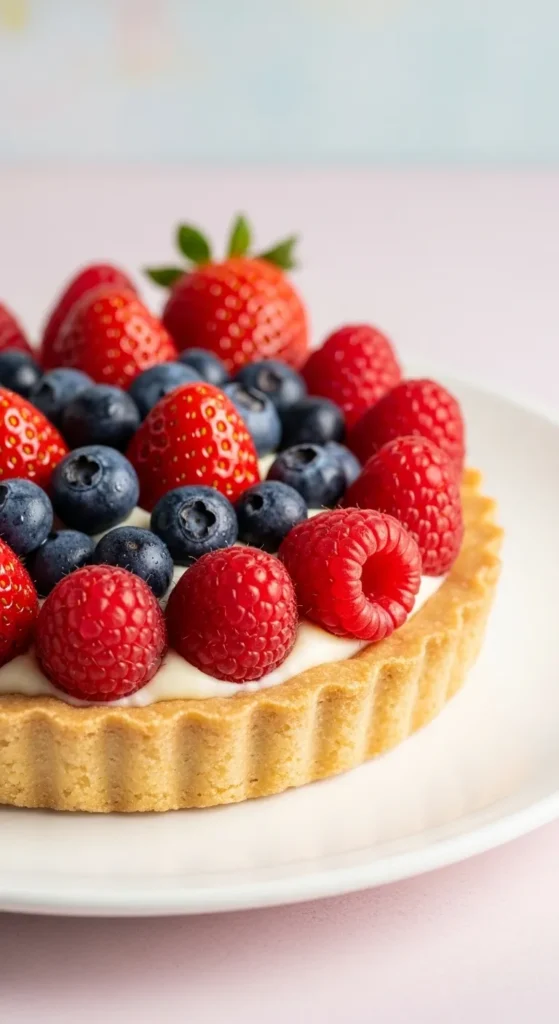
Berry Tart with Almond Crust
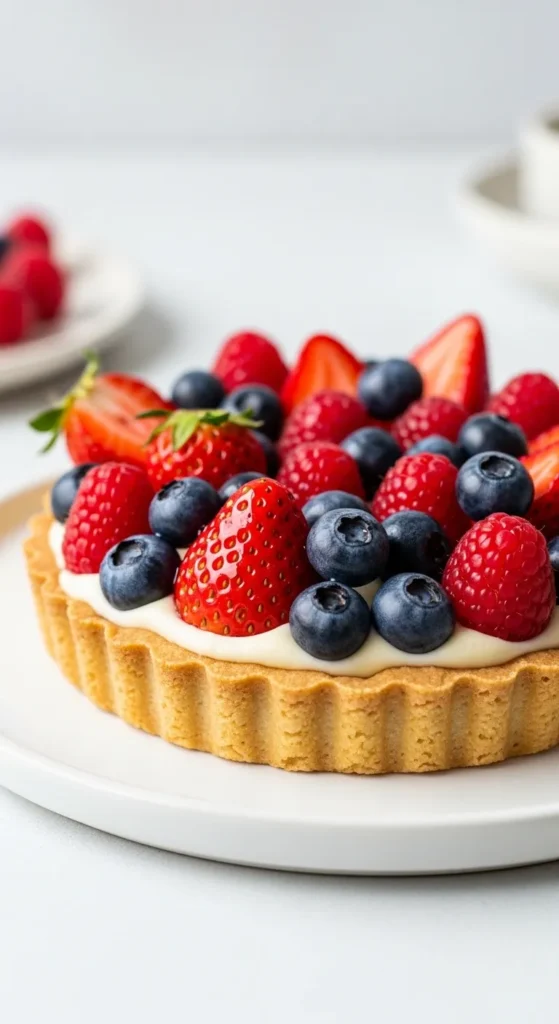
So you want a dessert that looks like it came from a fancy bakery… but secretly requires very little effort? Perfect. This Berry Tart with Almond Crust is basically the dessert equivalent of showing up to a party looking effortlessly stylish while secretly wearing sweatpants underneath.
It’s crisp, buttery, fruity, creamy, and just fancy enough to make people assume you know what you’re doing in the kitchen. Don’t worry though we’ll keep it simple. No culinary degree required.
Why This Recipe is Awesome
Let’s start with the obvious: this tart looks impressive. Like, “people will ask if you bought it from a pastry shop” impressive. But the truth? It’s surprisingly easy.
Here’s why this recipe deserves a spot in your dessert rotation:
1. The almond crust is ridiculously good.
It’s buttery, slightly nutty, and has the perfect crisp texture. Honestly, you might want to eat it by itself.
2. Berries do most of the decorating.
No frosting skills required. Just toss berries on top and suddenly you’re a dessert artist.
3. It’s lighter than most desserts.
Compared to heavy cakes or super-rich brownies, this tart feels fresh and bright.
4. It’s flexible.
Use strawberries, blueberries, raspberries, or whatever berries you have in the fridge.
5. It works for literally any occasion.
Brunch? Yes. Dinner party? Absolutely. Random Tuesday night snack? Obviously.
In short: minimal effort, maximum bragging rights.
Ingredients You’ll Need
Nothing weird or hard to find here. Just simple ingredients doing delicious things together.
For the almond crust:
- 1 ½ cups almond flour (the star of the show)
- ¼ cup all-purpose flour
- ¼ cup granulated sugar
- ¼ teaspoon salt
- ½ cup unsalted butter, melted
- ½ teaspoon vanilla extract
For the creamy filling:
- 1 cup cream cheese, softened
- ½ cup powdered sugar
- 1 teaspoon vanilla extract
- ½ cup heavy cream
For the topping:
- 1 to 1½ cups mixed berries (strawberries, raspberries, blueberries, etc.)
- 1 tablespoon honey or apricot jam (optional, for shine)
Pro tip: Use fresh berries whenever possible. Frozen berries tend to get watery and your tart deserves better.
Step-by-Step Instructions
1. Preheat the Oven
First things first: preheat your oven to 350°F (175°C).
Skipping this step is like starting a race with untied shoes. Things won’t end well.
Line a tart pan or pie dish with parchment paper if you want easy removal later.
2. Make the Almond Crust
In a bowl, combine:
- almond flour
- all-purpose flour
- sugar
- salt
Pour in the melted butter and vanilla extract. Mix everything until a soft dough forms.
Press the mixture evenly into your tart pan. Use your fingers or the bottom of a glass to smooth it out.
3. Bake the Crust
Bake the crust for 12–15 minutes, or until it turns lightly golden. The kitchen will start smelling amazing around minute ten. That’s normal. Try not to eat the crust immediately. Let it cool completely before adding the filling. Hot crust + creamy filling = sad melted mess.
4. Make the Creamy Filling
In a mixing bowl, beat the cream cheese until smooth. Add powdered sugar and vanilla extract, then mix again. In a separate bowl, whip the heavy cream until soft peaks form. Gently fold it into the cream cheese mixture.
Now you’ve got a light, fluffy filling that tastes like cheesecake’s cooler cousin.
5. Assemble the Tart
Spread the cream filling evenly over the cooled crust. Smooth it with a spatula so it looks nice and polished. Then comes the fun part: pile on the berries. Arrange them neatly or just scatter them casually. Either way works.
6. Add a Glossy Finish (Optional but Fancy)
Warm the honey or apricot jam slightly, then brush it lightly over the berries. This gives the tart that shiny bakery-style finish and makes the fruit look extra appealing.
7. Chill Before Serving
Place the tart in the fridge for at least 1 hour. This helps the filling set and keeps everything nicely structured. Slice, serve, and prepare for compliments.
Common Mistakes to Avoid
Even simple recipes have a few traps. Let’s dodge them.
Using a warm crust
Adding filling to a hot crust will melt everything. Let it cool completely.
Overmixing the filling
Once the whipped cream is folded in, stop mixing. Overdoing it can deflate the fluffy texture.
Not pressing the crust firmly enough
Loose crust equals crumbly slices. Press it down well.
Skipping the chill time
Yes, you’re excited to eat it. But patience matters here.
Using soggy berries
Wet fruit will water down the tart. Dry them gently with paper towels first.
Alternatives & Substitutions
One of the best things about this tart is how easy it is to customize.
No almond flour?
Use graham cracker crumbs instead. Mix them with butter and sugar to create a simple crust.
Want it dairy-free?
Swap cream cheese with a plant-based version and use coconut cream instead of heavy cream.
Different fruits?
Go wild. Peaches, kiwi, mango slices, or cherries all work beautifully.
Want extra flavor?
Add a little lemon zest to the filling. It brightens everything instantly.
Chocolate lover?
Drizzle melted dark chocolate over the berries. IMO, chocolate improves almost everything.
FAQ (Frequently Asked Questions)
Can I make this tart ahead of time?
Absolutely. In fact, it’s better that way. Make it the day before and keep it refrigerated until serving.
Can I use frozen berries?
Technically yes, but fresh berries look and taste better. Frozen ones release a lot of liquid, which can make the tart soggy.
Do I need a tart pan?
Not really. A pie dish works perfectly fine. The tart police will not come after you.
How long does it last in the fridge?
About 2–3 days, covered. After that, the berries start losing their charm.
Can I freeze the tart?
You can freeze the crust, but freezing the fully assembled tart isn’t ideal. The filling texture changes and berries get mushy.
Can I make it sweeter?
Sure. Add an extra tablespoon of powdered sugar to the filling if you prefer a sweeter dessert.
Final Thoughts
This Berry Tart with Almond Crust proves that you don’t need complicated techniques or fancy equipment to make something beautiful and delicious.
You get a buttery nutty crust, creamy filling, and bright juicy berries all in one bite. It’s simple, elegant, and honestly kind of addictive.
The best part? Once you make it once, you’ll realize how easy it is to customize. Different berries, new flavors, maybe even a chocolate drizzle next time.
So go ahead grab those berries and make the tart. Then sit back and enjoy the moment when someone asks, “Wait… you made this?”
Printable Recipe Card
Want just the essential recipe details without scrolling through the article? Get our printable recipe card with just the ingredients and instructions.