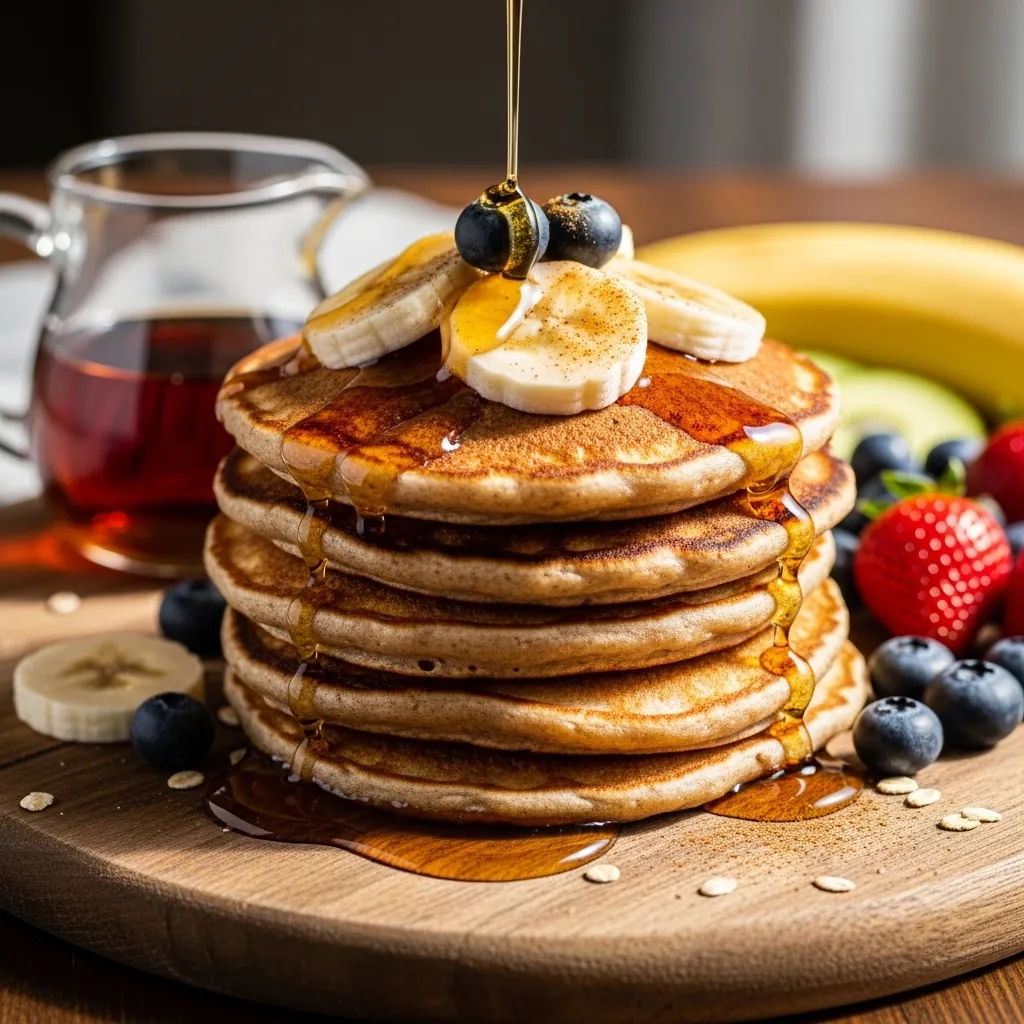
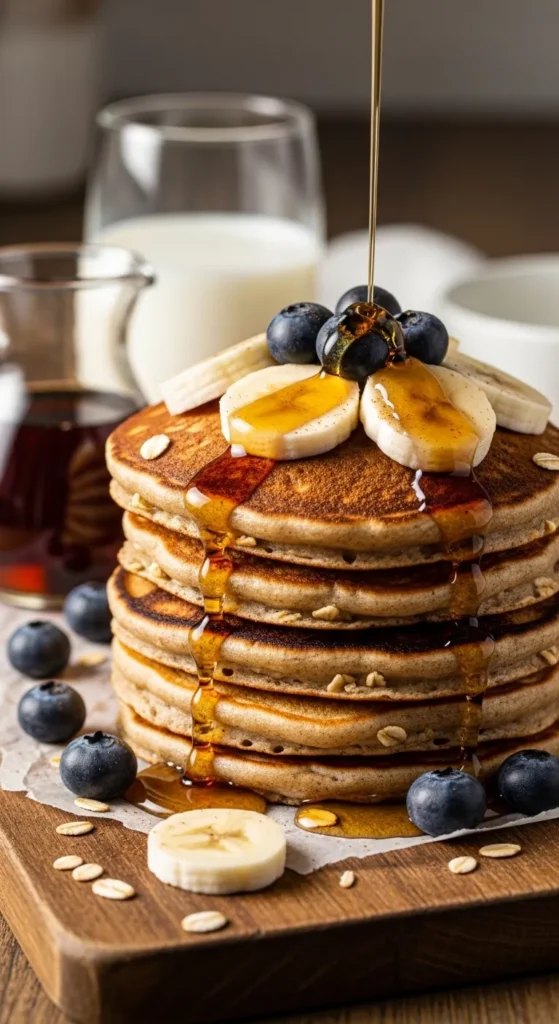
Banana Oat Pancakes
So you want pancakes… but you also want to feel like a responsible adult who makes “healthy choices”? Say hello to Banana Oat Pancakes—the breakfast that says, “I’ve got my life together,” even if you absolutely do not.
They’re fluffy, naturally sweet, and made with ingredients you probably already have hanging around your kitchen. No weird stuff. No complicated steps. Just blend, pour, flip, and boom—breakfast hero status unlocked.
Let’s get into it.
Why This Recipe is Awesome
First of all, these pancakes are basically a glow-up for sad, spotty bananas. You know the ones. The “I swear I was going to make banana bread” bananas.
Here’s why you’ll love them:
- Naturally sweet. Thanks, bananas. No sugar crash at 10 a.m.
- Gluten-free friendly. Oats instead of flour? Yes please.
- Idiot-proof. If I didn’t mess it up, you won’t either.
- Blender batter. Fewer dishes = instant happiness.
- Kid-approved. Adults pretend they’re for the kids. We know the truth.
They’re hearty without feeling heavy. You’ll stay full for hours instead of rummaging through the snack drawer 45 minutes later like a raccoon.
And the best part? They taste like dessert. But you can still smugly call them “healthy.” Balance.
Ingredients You’ll Need
Simple. Basic. No dramatic grocery store runs required.
- 2 ripe bananas – The spottier, the better. Sweetness level: expert.
- 2 eggs – For structure and fluff factor.
- 1 cup rolled oats – The humble hero of this story.
- ½ teaspoon baking powder – For that gentle lift.
- ½ teaspoon cinnamon (optional) – Adds cozy vibes.
- 1 teaspoon vanilla extract – Makes everything taste fancy.
- Pinch of salt – Don’t skip it. It matters.
- Butter or oil for cooking – So your pancakes don’t cling like a toxic ex.
That’s it. Seven-ish ingredients. We love a low-maintenance recipe.
Step-by-Step Instructions
1. Blend It All
Throw the bananas, eggs, oats, baking powder, cinnamon, vanilla, and salt into a blender. Blend until smooth.
You’re looking for a thick but pourable batter. If it seems too thick, add a tiny splash of milk. Don’t overthink it.
2. Let It Rest (Yes, Really)
Let the batter sit for about 5 minutes.
The oats absorb liquid and thicken up nicely. This step makes the texture way better. Patience, my friend.
3. Heat the Pan
Place a non-stick pan over medium heat. Add a little butter or oil.
Medium heat is key. Too high and you’ll burn the outside while the inside stays gooey. Rookie mistake.
4. Pour & Shape
Pour small rounds of batter into the pan—about 2–3 tablespoons each.
These pancakes are softer than regular ones, so smaller is smarter. They’re delicate little angels.
5. Flip Like a Pro
Cook for 2–3 minutes until bubbles form and the edges look set.
Slide your spatula underneath and flip confidently. No hesitation. Commit to the flip.
6. Finish & Repeat
Cook another 1–2 minutes on the other side.
Transfer to a plate and repeat with the remaining batter. Try not to eat them straight from the pan. (Or do. I won’t judge.)
Common Mistakes to Avoid
Let’s save you from pancake heartbreak.
1. Using underripe bananas.
If your bananas are still yellow and firm, the pancakes won’t be sweet enough. You want soft, brown-spotted bananas. Trust the process.
2. Cooking on high heat.
This is not a steak. Lower the heat. Let them cook gently so the inside sets properly.
3. Making them too big.
They’re not traditional diner pancakes. Smaller pancakes flip easier and cook better.
4. Skipping the rest time.
Those 5 minutes matter. Oats need a second to hydrate. Give them their spa moment.
5. Over-blending.
Blend until smooth, then stop. You’re making pancakes, not oat smoothie soup.
Alternatives & Substitutions
Because life happens.
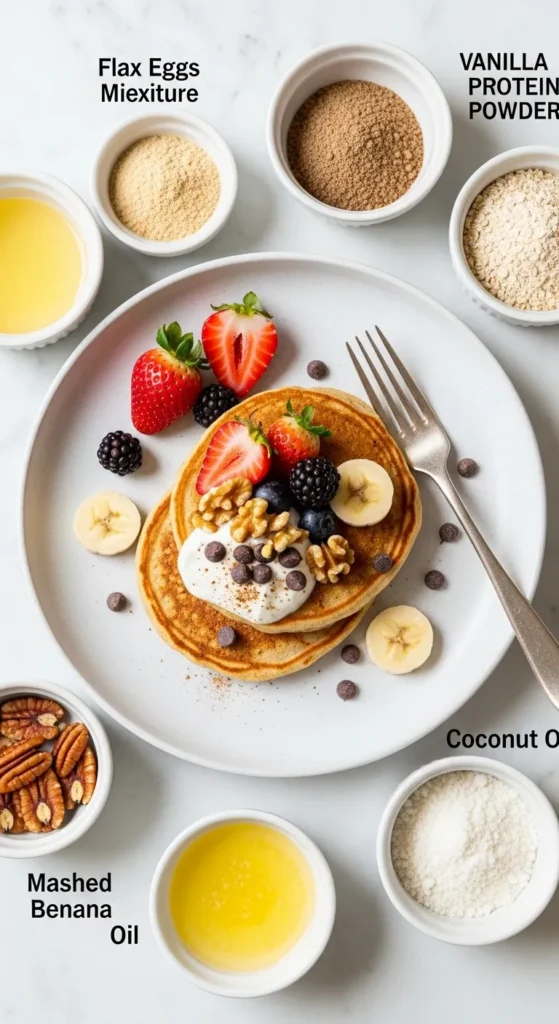
- No eggs? Try 2 flax eggs (1 tbsp ground flax + 2.5 tbsp water per egg). Texture will be slightly softer, but it works.
- No blender? Use oat flour instead of whole oats and mash the bananas really well. Whisk everything together like a champ.
- Want more protein? Add a scoop of vanilla protein powder. You may need a splash of milk to loosen the batter.
- Dairy-free? Use coconut oil or any plant-based butter for cooking.
- Craving chocolate? Toss in a few dark chocolate chips. Suddenly it’s brunch-worthy.
- Want crunch? Add chopped walnuts or pecans. IMO, nuts make everything better.
Feeling spicy? Add a pinch of nutmeg. Feeling extra? Top with Greek yogurt and berries. You are the CEO of your pancakes.
FAQ (Frequently Asked Questions)
1. Can I make these without a blender?
Yes! Use oat flour instead of rolled oats. Mash the bananas until smooth and whisk everything together. Arm workout included, free of charge.
2. Can I store leftovers?
Absolutely. Store them in the fridge for up to 3 days. Reheat in a pan or toaster. They also freeze beautifully—just separate with parchment paper.
3. Why are my pancakes mushy inside?
You probably cooked them on heat that was too high. Lower the heat and give them time. They need a little patience and love.
4. Can I use quick oats?
Yep. Quick oats work fine. Steel-cut oats? Hard no. Those need actual cooking, not pancake magic.
5. Do they taste like bananas?
Yes—but in a good way. It’s a mild, natural sweetness. If you’re not a huge banana fan, add extra cinnamon or vanilla to balance it out.
6. Can I make the batter ahead of time?
You can, but it thickens as it sits. If making ahead, stir in a splash of milk before cooking to loosen it up.
7. Can I make them vegan?
Yes! Use flax eggs and plant-based cooking oil. They’ll be slightly softer, but still delicious.
Final Thoughts
Banana Oat Pancakes are one of those recipes that feel like a small life win. They’re easy, wholesome, and weirdly satisfying to make. You turn three basic ingredients into a stack of golden, fluffy goodness. That’s kitchen magic.
They’re perfect for lazy Sundays, busy weekdays, or those mornings when cereal just feels… uninspired. Add your favorite toppings, pour on some maple syrup, and enjoy every bite without the sugar crash drama.
Now go impress someone—or just yourself—with your new pancake skills. You’ve officially upgraded breakfast. And honestly? You deserve pancakes.
Printable Recipe Card
Want just the essential recipe details without scrolling through the article? Get our printable recipe card with just the ingredients and instructions.