
Classic Homemade Orange Candy Recipe
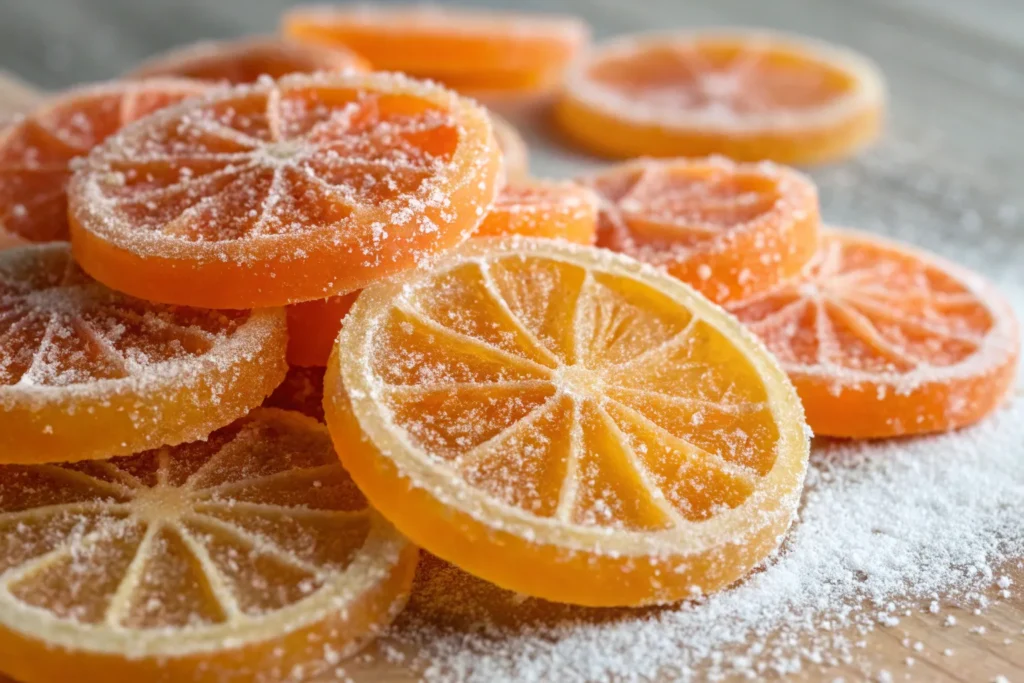
I’ve always had a soft spot for anything citrusy, and making these classic homemade orange candies quickly became one of my favorite little kitchen adventures. There’s something so satisfying about stirring the sugar and orange juice until it transforms into glossy, chewy candy, and the moment that first piece melts in your mouth? Pure joy. It’s sweet, tangy, and a little nostalgic all at once, like sunshine captured in a bite and I can’t wait for you to try making them at home too!
Why You’ll Love This Recipe
This recipe lets you transform fresh oranges into a classic candy with a glossy, jewel-like finish. The flavor is vibrant and natural, far better than store-bought versions. The process is easy to follow and requires minimal ingredients, yet the results look professionally crafted. Kids and adults alike love the texture and citrus aroma, making it perfect for gifting, parties, or snacking.
Nutritional Info🍊
- Calories: 25–35
- Carbohydrates: 6–8 grams
- Sugar: 5–7 grams
- Fat: 0 grams
Time Taken🍊
- Prep time: 10 minutes
- Cook time: 20 minutes
- Setting time: 2–3 hours
- Total time: Around 3 hours and 30 minutes
Ingredients🍊
- Fresh oranges or mandarins
- Sugar
- Water
- Orange zest (optional for stronger flavor)
- Powdered sugar or fine granulated sugar for coating
Instructions

- Slice the oranges into even, thin rounds, removing seeds.
- In a saucepan, combine sugar and water to create a light syrup. Heat until the sugar dissolves completely.
- Add the orange slices to the syrup and simmer on low heat until translucent and softened.
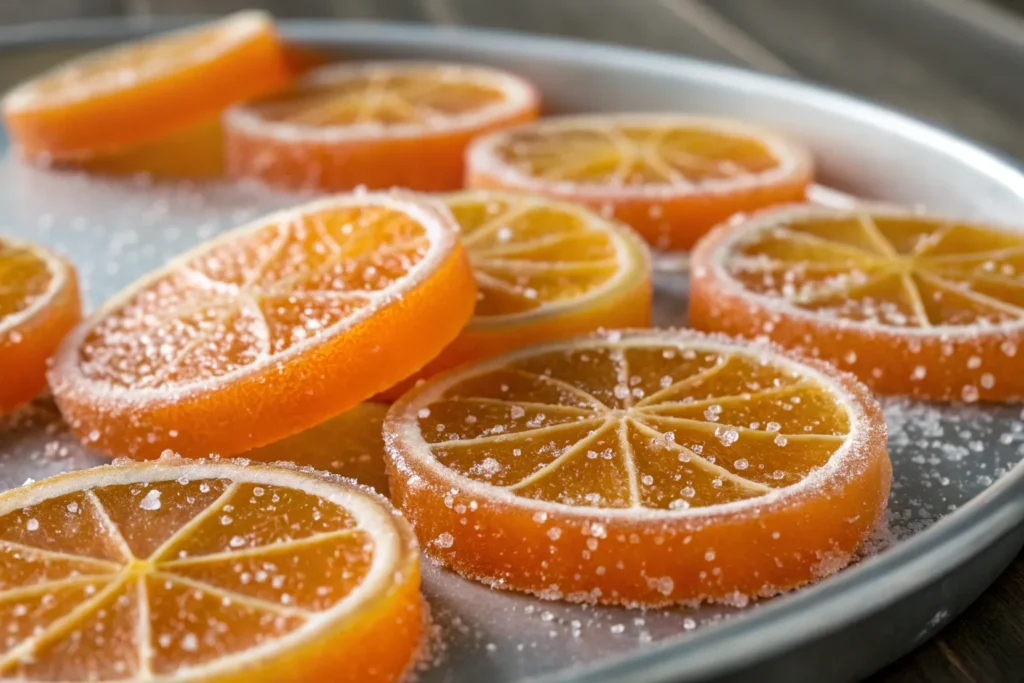
- Carefully remove the slices and place them on a parchment-lined tray to dry.
- Once they begin to firm up, dust lightly with fine sugar to create the crystallized effect.
- Allow them to set fully for at least 2 hours before serving or storing.
You Must Know
If you want your homemade orange candies to look and taste like a dream, here’s the scoop: always keep the heat low while simmering the oranges, rushing it can scorch the syrup or make the fruit taste bitter. Slice your oranges thin and even; not only does it help them cook perfectly, but it also gives each candy a beautiful, translucent shape. And patience is key, let the candies dry completely before storing or serving, or they’ll stick together. Follow these little tricks, and you’ll end up with glossy, melt-in-your-mouth treats that everyone will swoon over!
Storage Tips
Keep your homemade orange candies happy and glossy by storing them in an airtight container at room temperature for up to a week. Make sure they’re in a cool, dry spot, and don’t pile too many layers on top of each other or they’ll start sticking together. Want them to last a little longer? Just slip a sheet of parchment or wax paper between the layers, and they’ll stay perfectly separated and ready to enjoy anytime.
Ingredient Substitutions
Feel like mixing things up? Try swapping the oranges for lemons, grapefruits, or even blood oranges for a fun twist on flavor and color. You can also replace white sugar with coconut sugar, it gives your candies a rich, caramel-like depth. For an extra cozy touch, stir a splash of vanilla or a sprinkle of cinnamon into the syrup while cooking. Little swaps like these turn a classic recipe into your own signature treat!
Serving Suggestions
These little orange candies are as versatile as they are delicious! Enjoy them as a sweet snack, sprinkle them over cakes for a zesty garnish, or pack them in pretty jars to give as thoughtful homemade gifts. They’re a perfect match for tea, coffee, or any holiday dessert spread, little bites of sunshine that make every treat feel extra special.
Cultural and Historical Context
Candied citrus fruits have been made for centuries in Mediterranean and European regions, where preserving fruit with sugar was a traditional method. Over time, citrus candies became a festive specialty, especially in winter seasons when oranges were harvested and celebrated.
Seasonal Adaptations
These classic orange candies are perfect all year round! In winter, add a pinch of warming spices like cinnamon or nutmeg to the syrup for cozy holiday vibes. In spring, try swapping in bright lemons or blood oranges for a fresh, tangy twist. For summer, serve them chilled or even dipped in dark chocolate for a refreshing treat. And in fall, mix in a little ginger or clove to echo the flavors of the season, perfect for gifting or adding to autumn dessert platters. Small tweaks make these candies a festive favorite no matter the time of year.
Success Stories
These little orange gems have a way of bringing smiles wherever they go! Friends and family often tell me they taste like sunshine in a bite, and they’re a hit at holiday gatherings, birthday parties, and cozy tea times. Some even say they’re addictive, one batch never lasts more than a day in our house! From gifting in pretty jars to sprinkling over cakes, these candies have turned ordinary moments into sweet, memorable ones.
Freezer Meal Conversion
Candied citrus doesn’t freeze well once it’s made, the texture can get a little sad but here’s a handy trick: you can freeze your orange slices before candying to save prep time. Just thaw them completely before simmering in the syrup, and you’ll still get glossy, flavorful candies without any fuss.
Pro Tips🍊
- Slice oranges thinly for faster cooking and better shape.
- Let the syrup simmer gently to avoid bitterness.
- Dry the candies on a cooling rack for better airflow.
Chef’s Special Tips
For a glossy finish, brush the candies lightly with a bit of warm syrup before dusting with sugar. To intensify flavor, simmer the syrup with orange zest and strain before using. You can also dip half of each candy in melted dark chocolate for a gourmet twist.
Conclusion
Classic Homemade Orange Candy captures the beauty and brightness of citrus in every bite. With its simple technique and striking presentation, this recipe is perfect for holidays, gifting, or everyday snacking. If you want more fruit-based treats or vintage candy recipes, tell me your next idea and I’ll create it for you.
Frequently Asked Questions(FAQs)
Can I use mandarins instead of oranges?
Yes, mandarins, clementines, or tangerines all work beautifully. They often have a sweeter taste and softer texture, making them ideal for candying.
Why did my orange slices turn bitter?
Bitterness usually comes from overheating the syrup or simmering at too high a temperature. Keep the heat low and steady, and avoid letting the syrup caramelize.
How thin should I slice the oranges?
Slice them about 1/8 to 1/4 inch thick. Thinner slices candy faster and look more translucent, while thicker slices need longer cooking and may stay chewy.
Do I have to remove the rind?
No, the rind stays on. It becomes soft and sweet during simmering and adds to the candy’s texture and appearance.
Can I speed up the drying process?
Yes, you can place the tray in a cool oven with the light on or use a dehydrator on low. Avoid high heat, which can make the candies sticky.
Can I reduce the sugar in the recipe?
You can reduce the sugar slightly in the syrup, but remember sugar is needed both for sweetness and proper preservation. For less sweetness, skip the final sugar coating.
How long will these candies last?
They last up to one week at room temperature in an airtight container. Make sure they are fully dried before storing to prevent moisture buildup.
Can I freeze the finished candies?
Freezing is not recommended because it changes the texture. They may become mushy once thawed.
Can I use the leftover syrup?
Yes, the leftover orange-infused syrup is delicious. Use it in cocktails, mocktails, iced tea, baking, or drizzle it over pancakes and desserts.
Why are my candies sticky even after drying?
Humidity is the most common issue. Dust lightly with extra sugar or let them dry longer in a low-humidity environment.
Printable Recipe Card
Want just the essential recipe details without scrolling through the article? Get our printable recipe card with just the ingredients and instructions.